Value Lists
Value lists are pre-defined sets of options that can be configured for comboboxes associated with the metadata.
When you go to the Value list page, you can see the value list with no selection. The Value and Detail panels are blank with instruction texts. It allows you to edit, delete and copy ID to clipboard for each item individually.
Search query
Entering a search query filters data based on the Value list name field. The results display value lists with no selection, leaving the Value and Detail panels empty.
Creating a value list
When you click on the +Value list button, it navigates to the creation step where you can fill in the Name to create a new Value list. After clicking on the Save button, it will navigate you back to the Value lists page and select the created Value list row.
Delete the value list
If the value is not assigned to any metadata yet, the delete icon is activated and you can click on it to delete the selected value permanently.

If the value is in use for at least one metadata, the delete icon is inactive, you can hover over it to see the tooltip with the message “The value list cannot be deleted because it is still in use.”

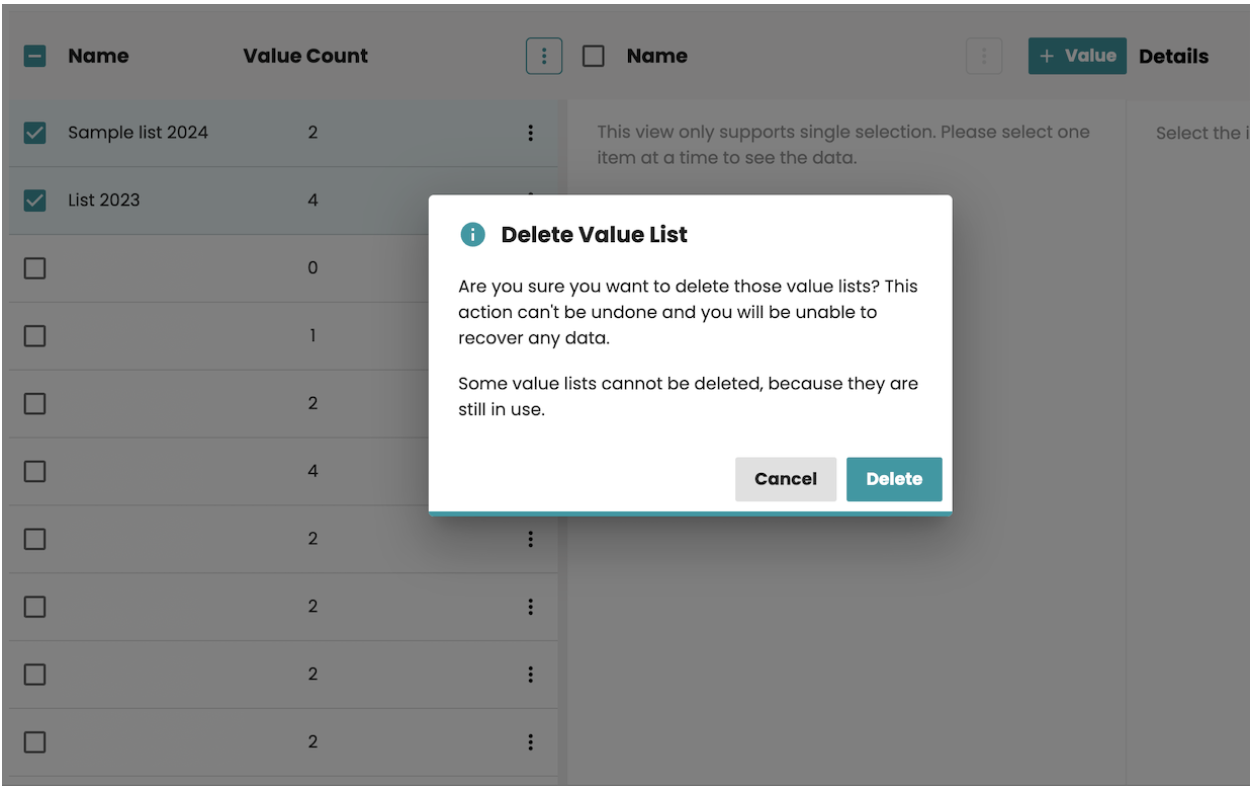
Bulk delete
If multiple items are selected and meet the condition that the value list has not been used for any metadata, when you click on the icon, a popup appears asking to confirm the bulk delete option. Once confirmed, the system should display a confirmation message after the deletion is successful.
If multiple items are selected and some of them have been in use for some metadata, the bulk delete option is displayed for deleting. When you click on the icon, a popup appears asking them to confirm the bulk delete option and also highlighting that some value lists are still in use for some metadata and cannot be deleted.
When the delete action is confirmed, relevant data in the database is deleted permanently.
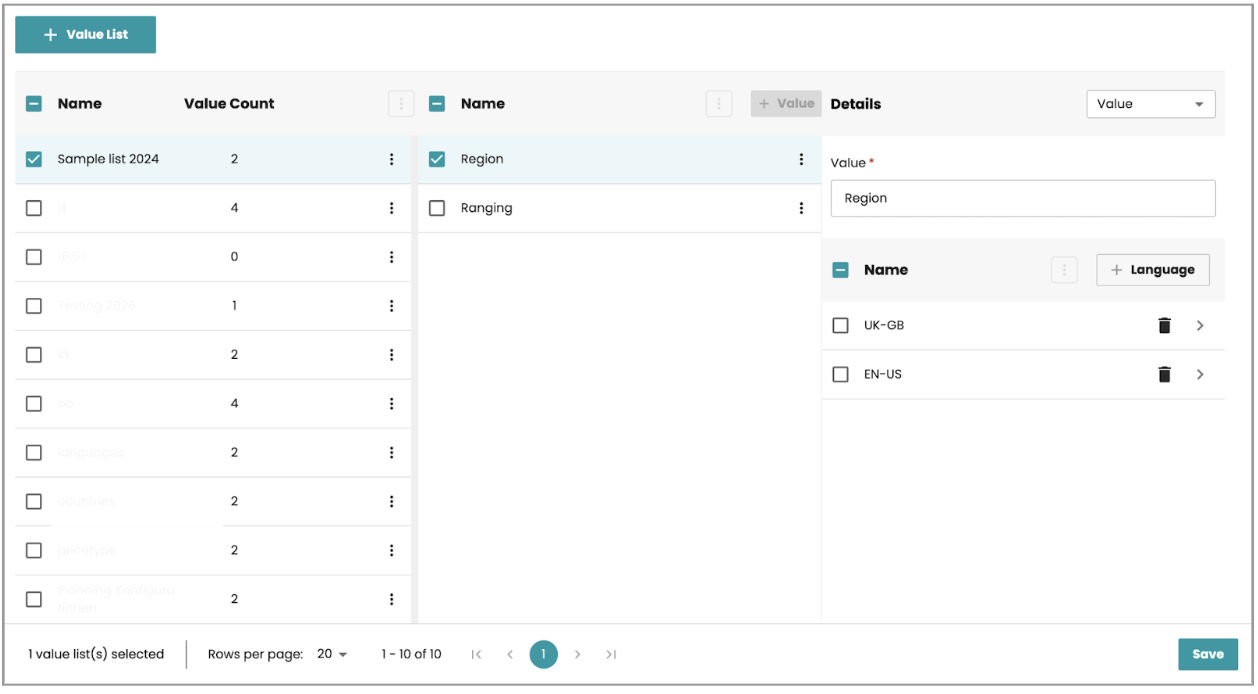
Handling the Values panel
Viewing Values: view existing value options in the Value panel.
Adding New Values: Click the "+Value" button to add a new option. Remember to save your changes before adding a new value.
Deleting: the system confirms deletion with a dialog box before proceeding. Upon successful deletion, a toast message appears.
Bulk deletion: selecting multiple items and clicking the delete icon prompts a confirmation popup. Confirmation triggers the deletion process, upon successful deletion, a toast message appears.
Handling the Detail panel
Selection: Selecting a value initially displays only one item. However, you can choose up to three values from the list ("Value," "Value 2," and "Value 3") using the filter above for full visibility.
Save Button: the Save button becomes active upon modifying any field.

Adding Languages: The "+Language" button allows adding new language options. Three initial values will display based on the chosen filter.
Deleting: the system confirms deletion with a dialog box before proceeding. Upon successful deletion, a toast message appears.
Bulk Deletion: selecting multiple items and clicking the delete icon prompts a confirmation popup.
Confirmation triggers the deletion process, followed by a successful deletion toast message.