Users Management
You can see a list of all users in the system by clicking on the Users section from the navigation menu.
Searching for Users
You can find Users in the application in several ways, starting with the Search bar on the header when landing on the Users screen. Start entering the Login Name, Full Name, or Email of the user you wish to search for. The result is returned in the same table.
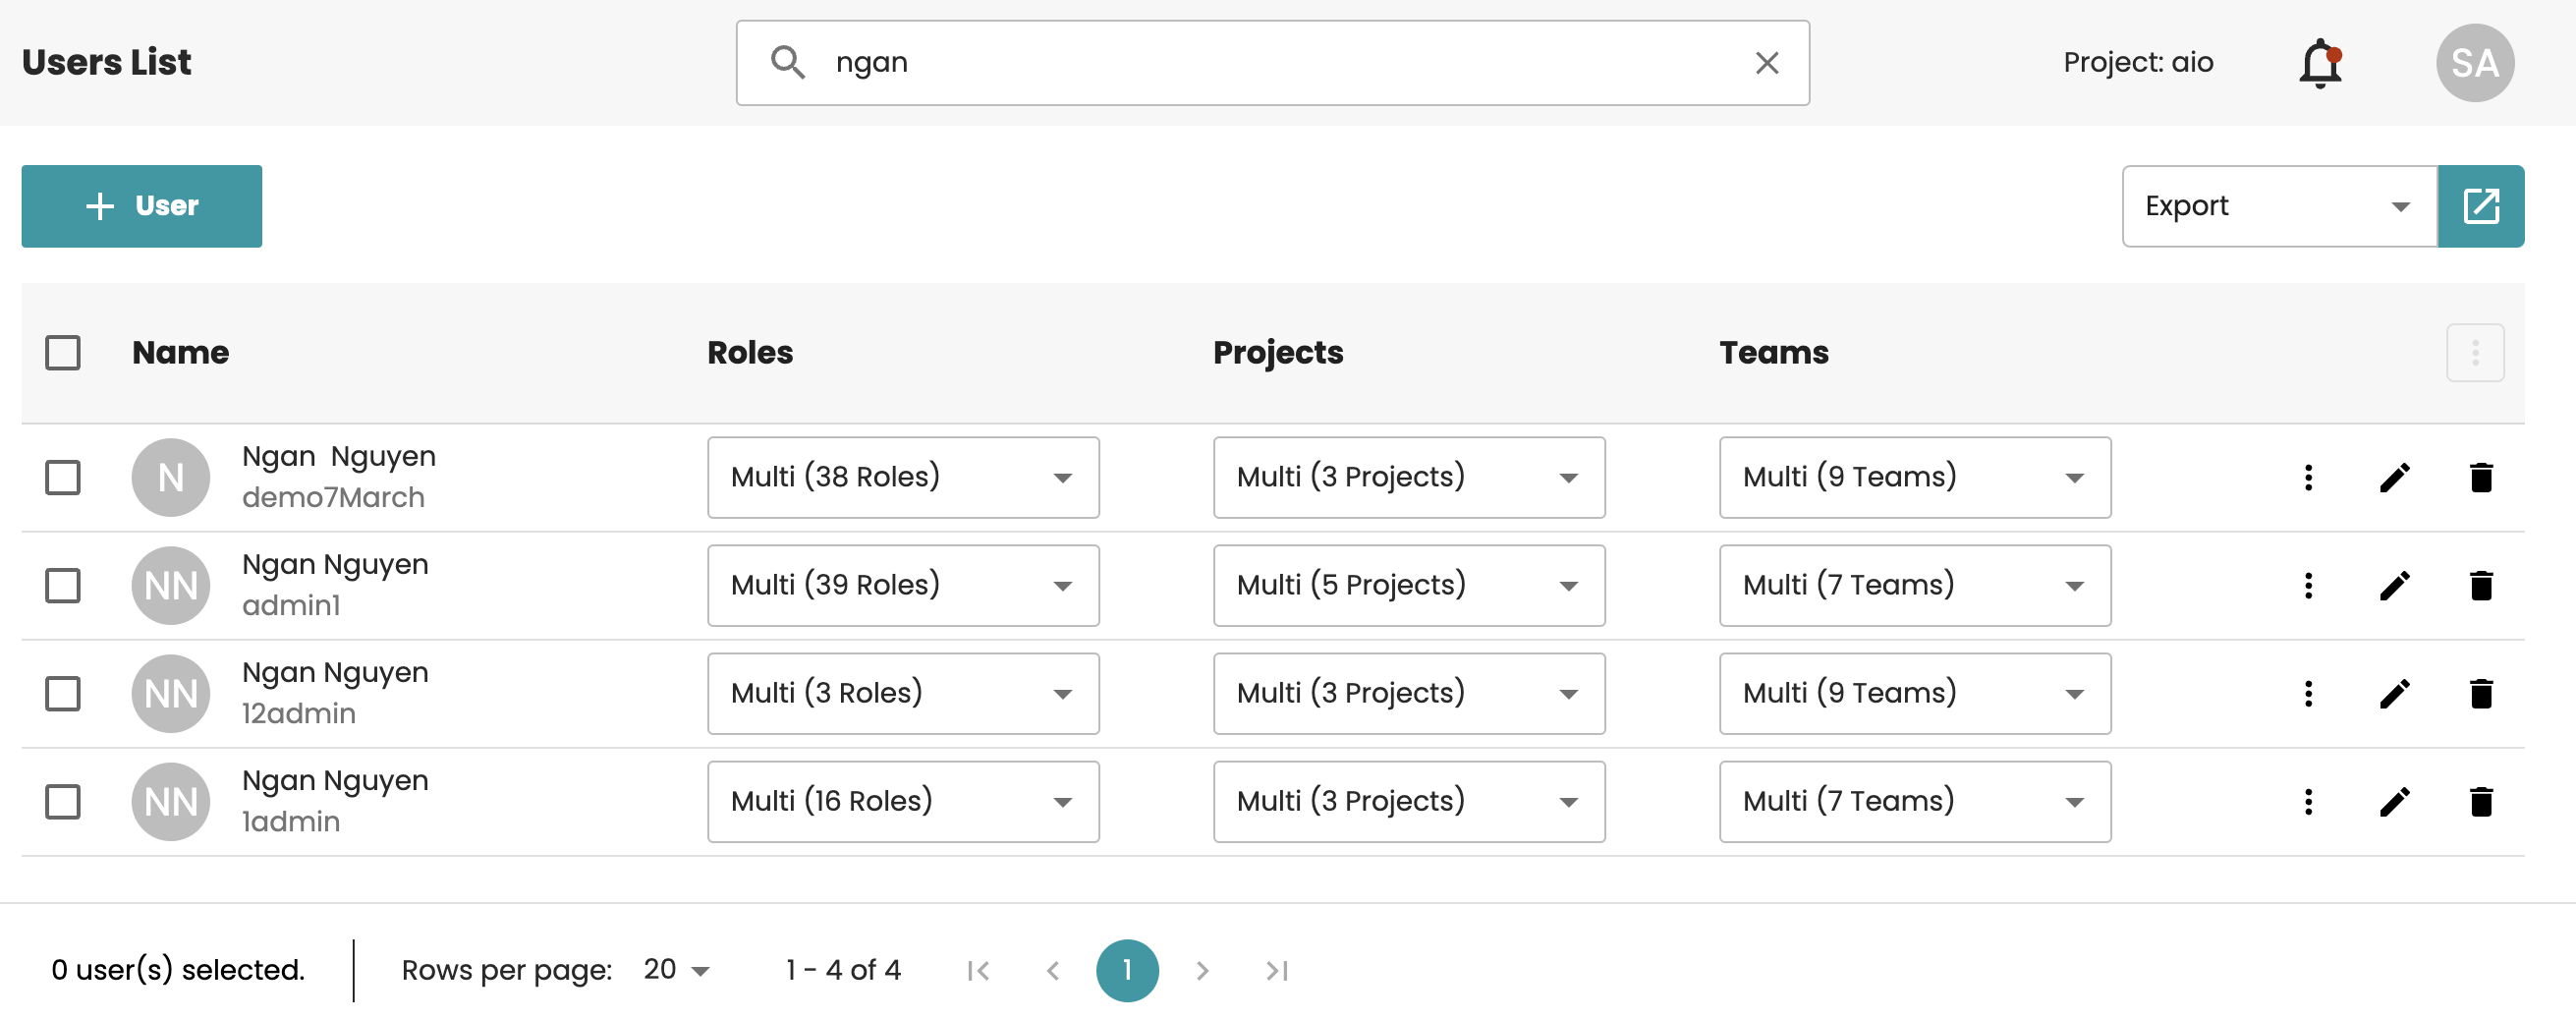
Sorting for Users
By default, login names are ordered by their latest update times. You can manually click on the column header to sort them alphabetically for a different view option.
Creating Users
From the Users page, click the "+ User" button, which has 4 steps that need to be done in order to create a new user.
Step 1. User infoFill out the required User details including: Email Address, Login Name , First Name, Last Name, Password , Retype Password , Checkbox User must change password at next login.
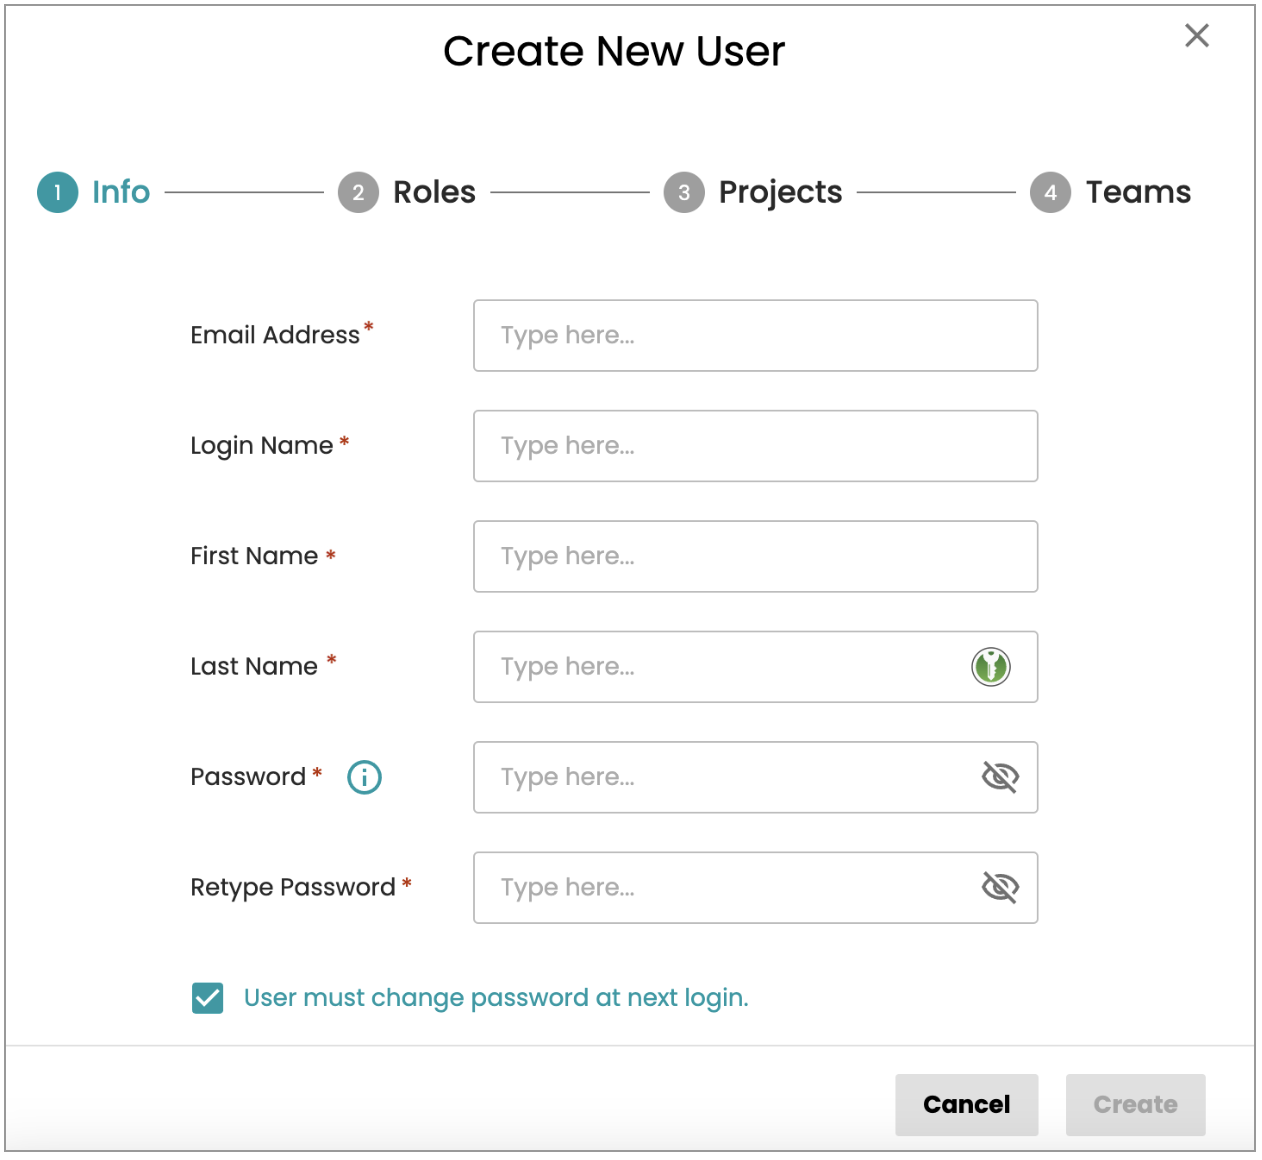
You will not be able to add a new user until the required fields validation has passed. The password rule is configured on Pubserver, and it will be a dynamic setting.
Save & ConfigureOnce you have successfully entered all required information, you will be able to choose "Create" this User. Selecting "Create" will take you to the Assign roles screen. You have now successfully added the user. If successful, you should see a success notification, or you will be informed of any issues.
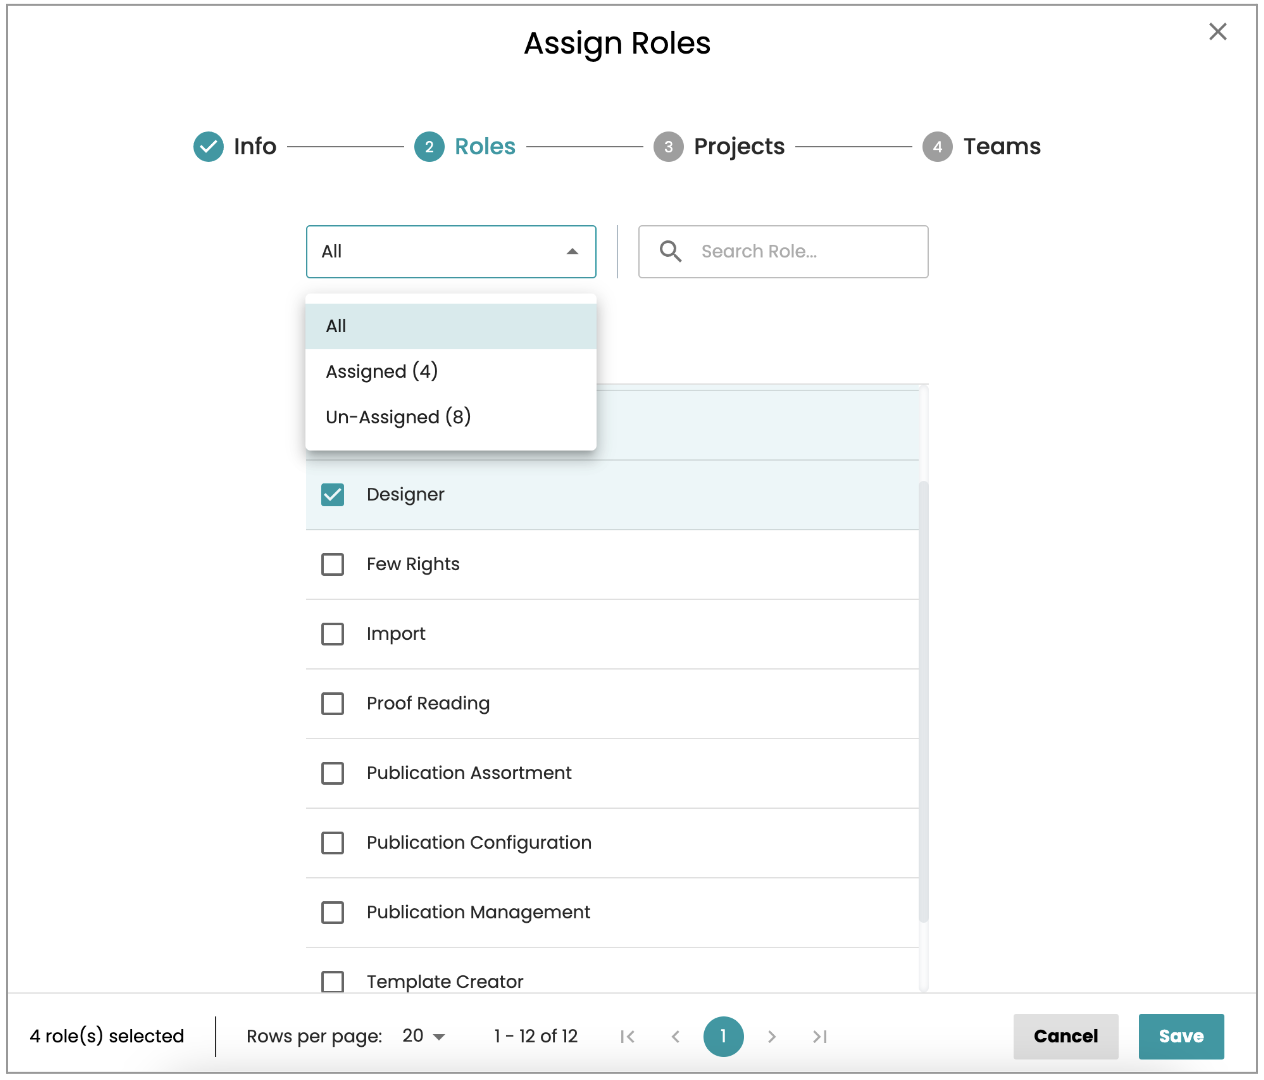
Step 2 - Assign Roles info
This is an optional step, you can skip it and revisit it later or you can start to select some roles to assign to the created user. Once you hit the Save button, you should see a success notification, or you will be informed of any issues. Then it will redirect you to the Assign Projects step.
This is an optional step, you can skip it and revisit it later or you can start to select some projects to assign to the created user. Once you hit the Save button, you should see a success notification, or you will be informed of any issues. Then it will redirect you to the Assign Team step.
Step 4 - Assign Teams infoThis is an optional step, you can skip it and revisit it later or you can start to select some teams to assign to the created user. Once you hit the Save button, you should see a success notification, or you will be informed of any issues. Then it will redirect you to the Users page with the selection focused on the created user and showing on top of the table.
Editing the user
Access the user details screen by finding the user that you want to edit in the Users page list, then clicking on the Edit icon on the right corner. This will take you to the dialog on the right side, where you can edit the required user details.
You will notice that there are 4 tabs explained below.
Info tab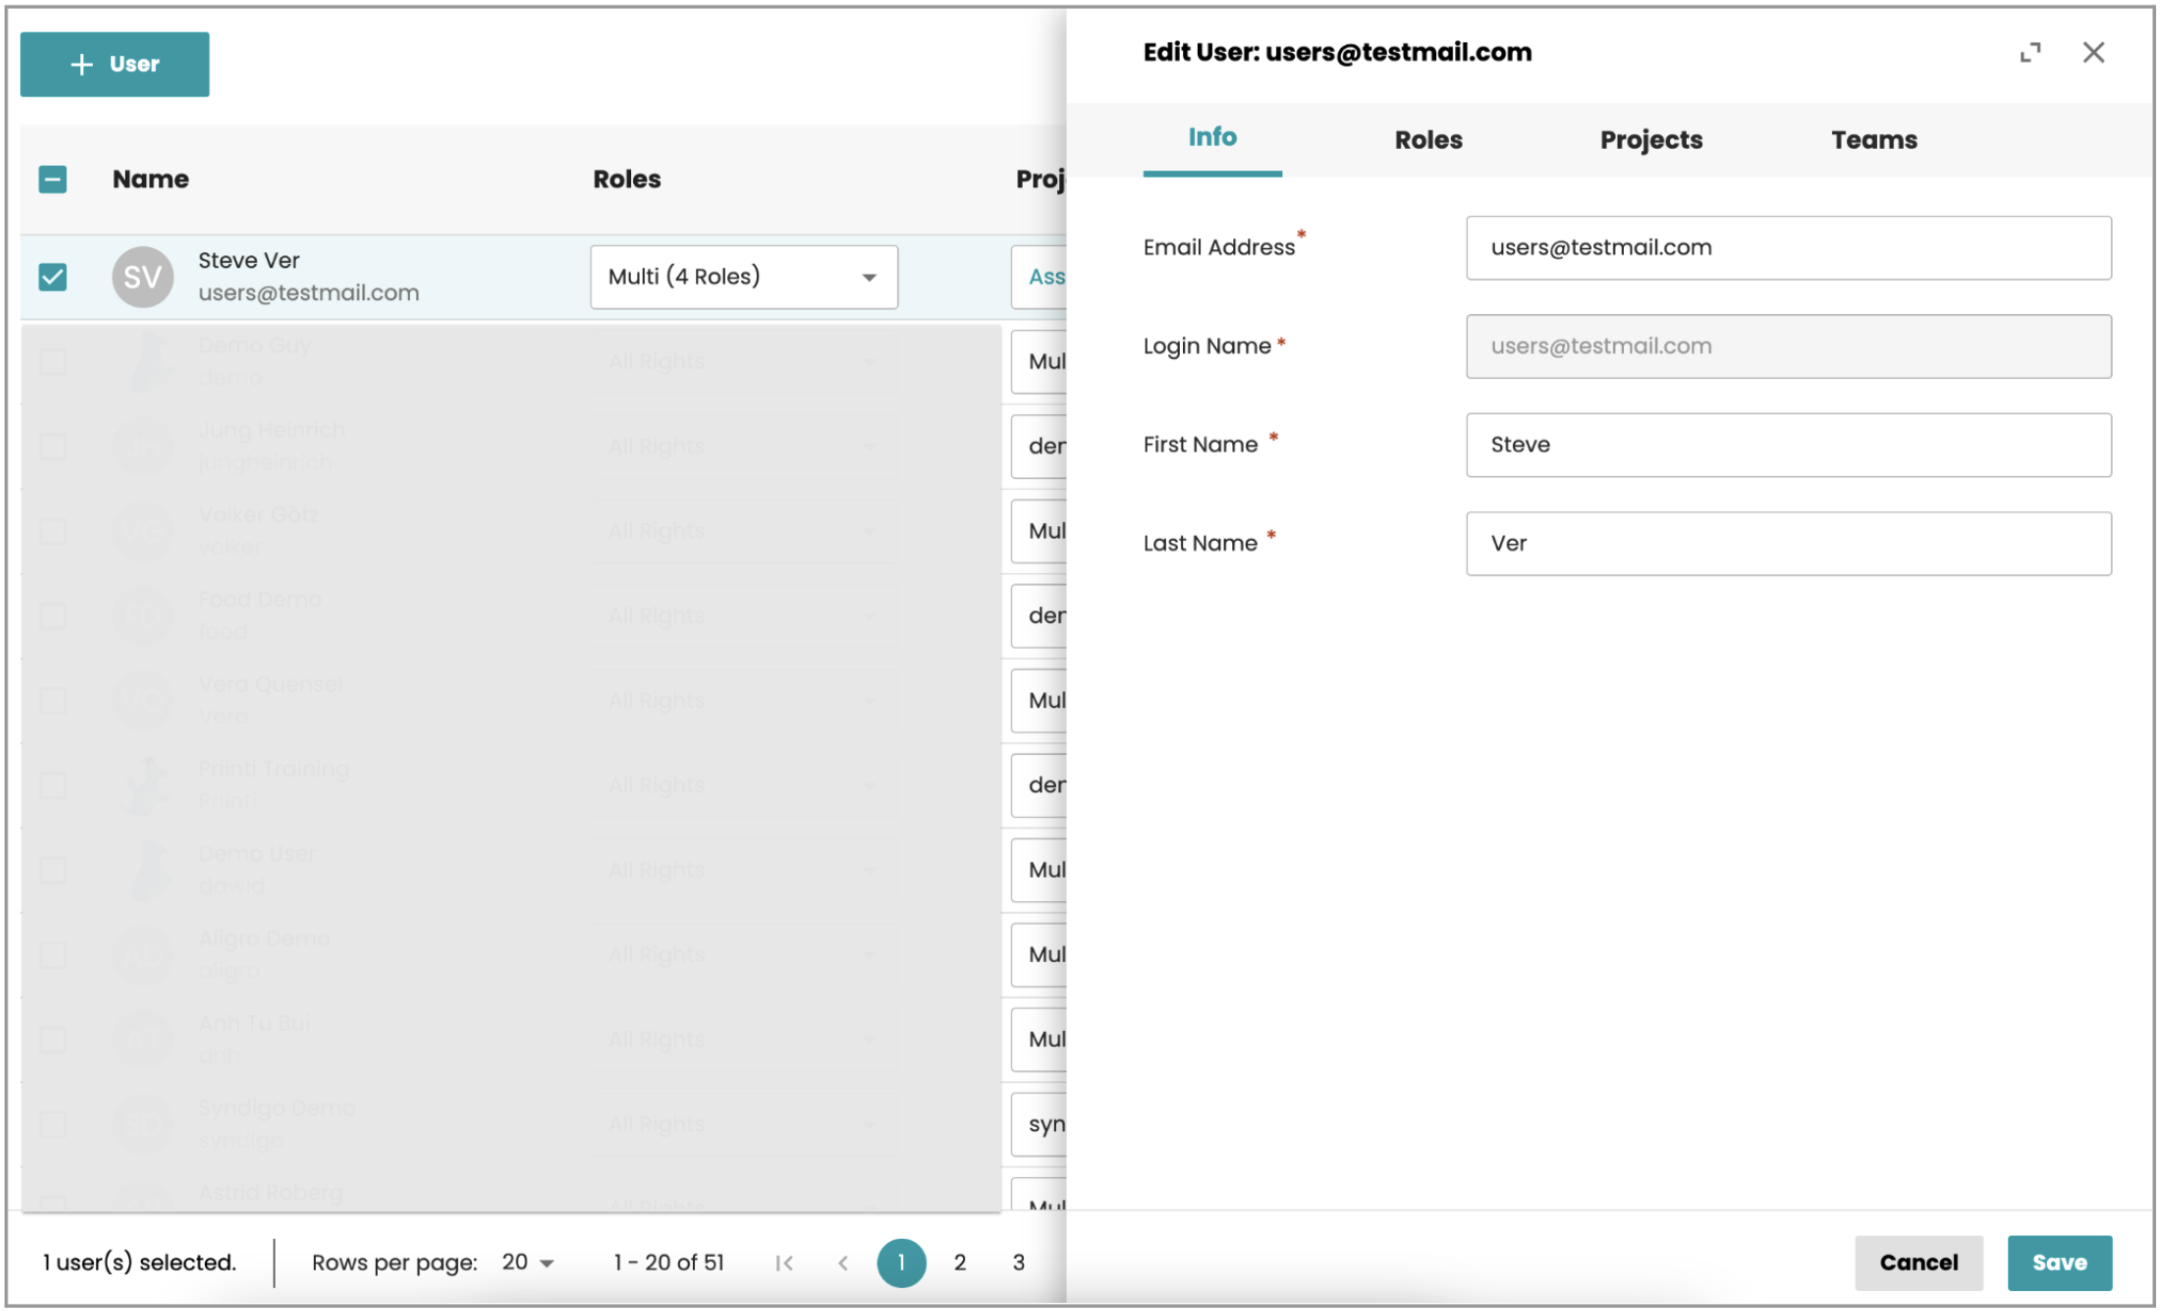
The default tab is the "Info" tab, where you will see the Login name in read-only mode, and be able to edit the following elements of the selected user: Email Address, First name, Last name. Once you have successfully made the edits you require, click Save, and you should then see a success message informing you that your changes have been saved.
Roles TabClicking on the Roles tab allows you to assign roles to the selected user. Using this screen you can assign available roles to this user, by checking the checkbox for the selected roles from the list.
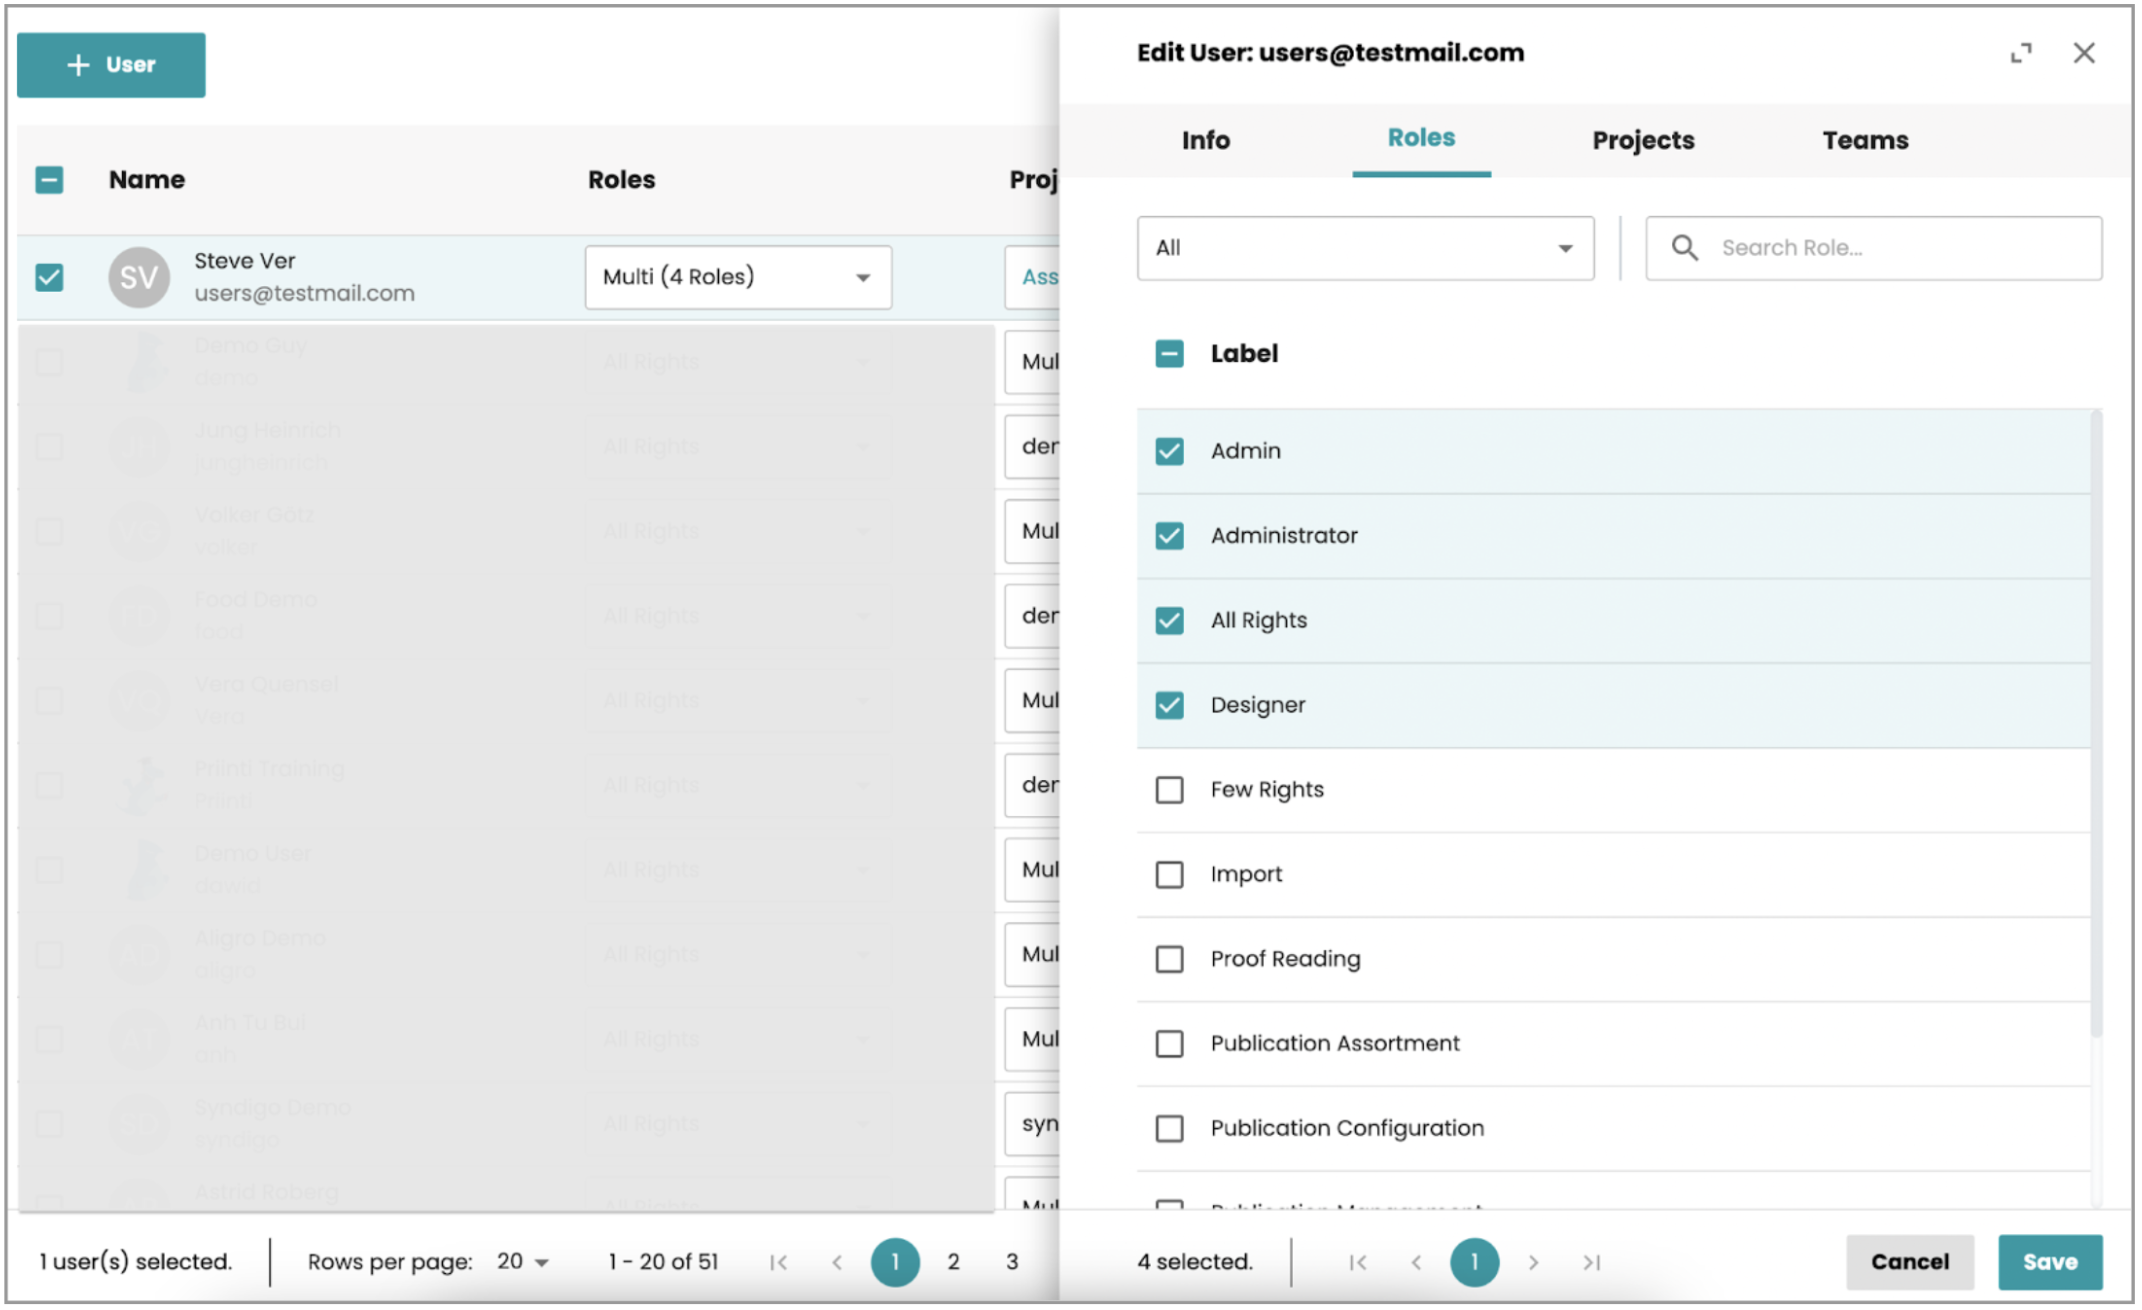
To un-assign roles from the selected user, uncheck the checkbox next to the role name you want to remove and hit the Save button to save the change.
Projects TabWithin the edit dialog of the selected user, clicking on this tab enables you to assign or unassign any project name from the available items list. Once you hit the Save button, you should then see a success dialog informing you that your change has been updated.
Teams tabClicking on the “Teams” tab in the edit dialog enables you to view all the team names that the selected User has given consent to.
Within the edit dialog of the selected user, clicking on the “Teams” tab enables you to assign or unassign any team name from the available items list.
Once you hit the Save button, you should then see a success dialog informing you that your change has been updated. Once you close the dialog, the users page reloads with the change updated.
Deleting Users
If you choose to delete the selected user from the Users page, click the delete icon on the right side. You also can delete multiple users at a time by selecting users on each checkbox, then clicking on three dot icon on the top right of the table and choose Delete icon.
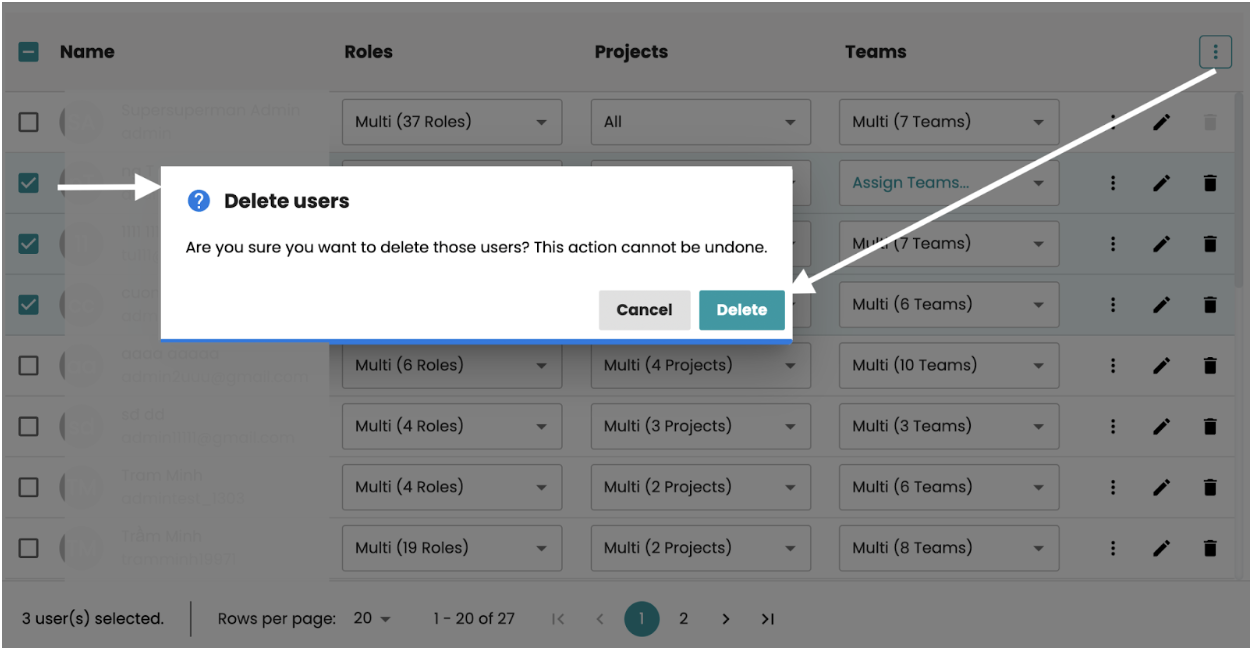
You should then see a dialogue warning you that you are going to delete the user(s). At this point you can either cancel, or continue with the delete. If the deletion of the user has been successful, a confirmation will appear. also
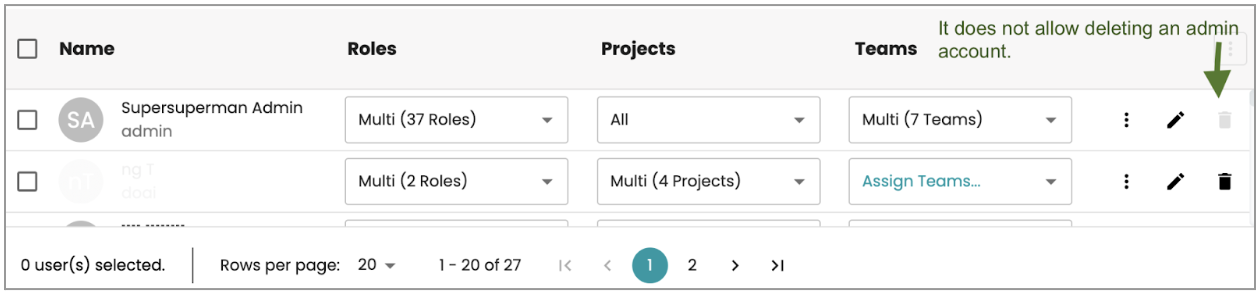
However, the system prevents you from deleting the admin account. The delete icon will be grayed out for this user account.
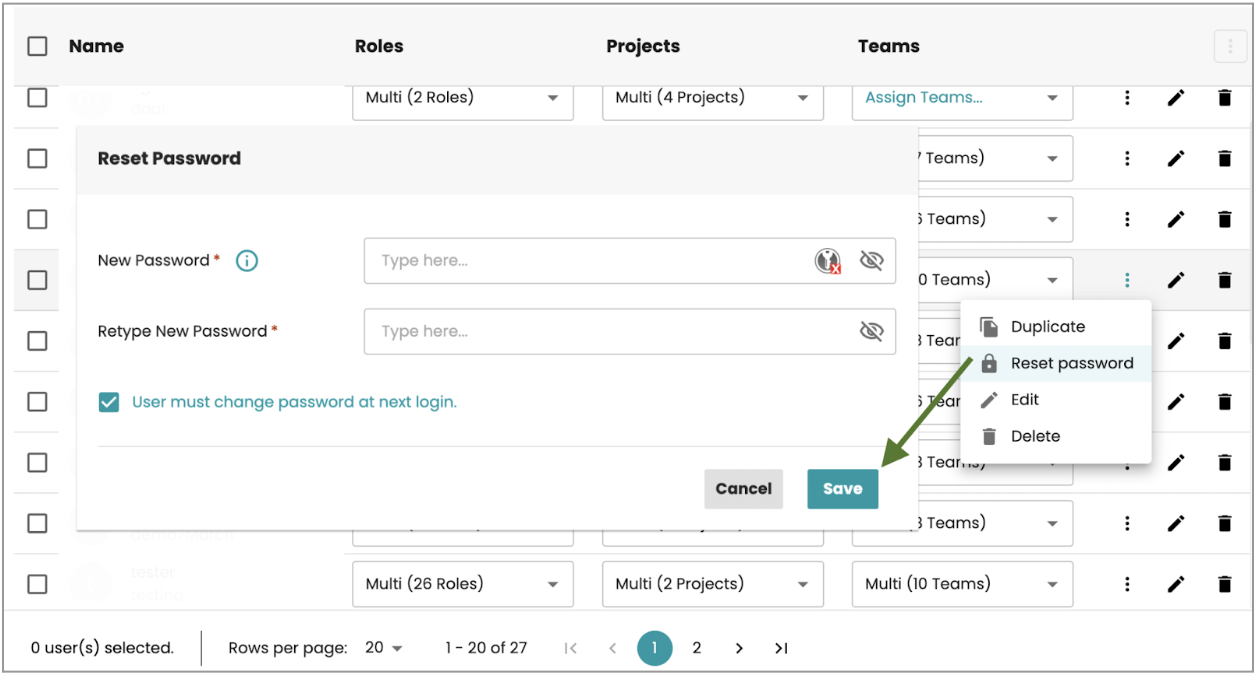
Reset Password for users
When you create a user, the system gives you the ability to force the created user to change their password the next time they log in. It is displayed on the Neowise when the user logs in for the first time. However, the reset password also applies the same logic that we give you the ability to reset a password for that user with the same functionality.
Duplicating the user
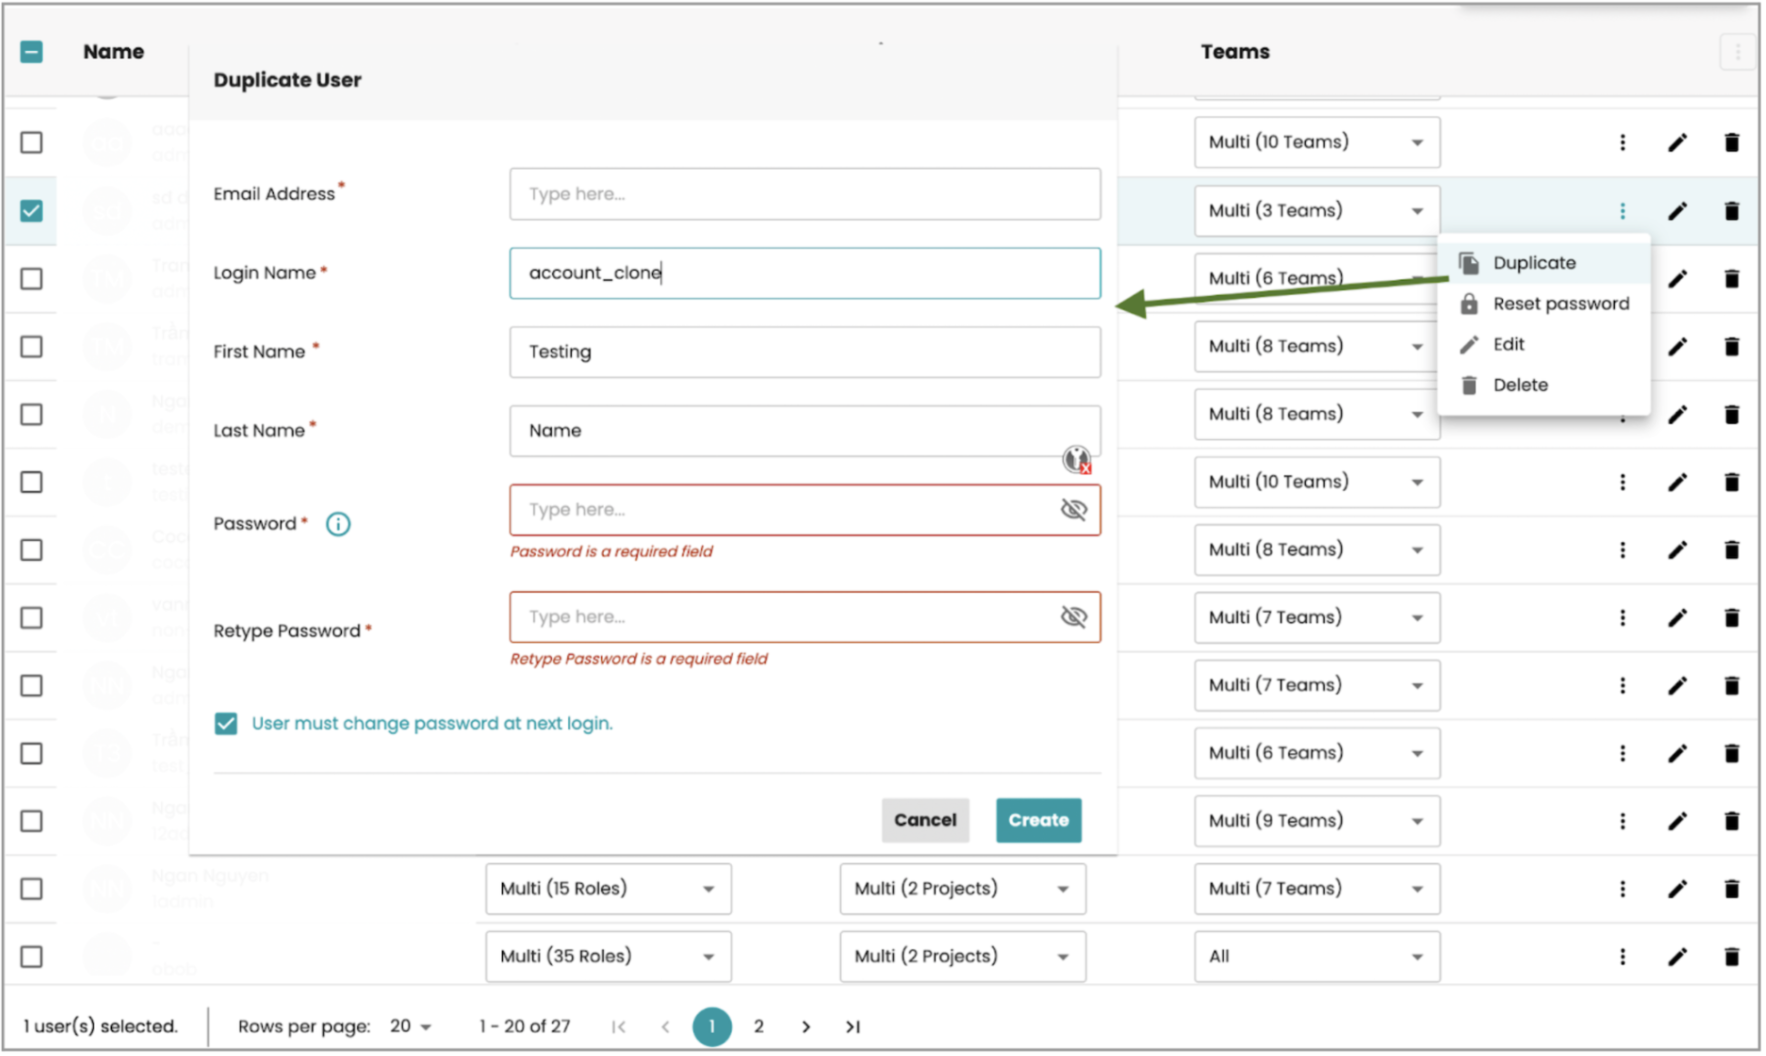
This option allows you to create a new user with the same roles, projects and teams functions as an existing user. This can save you time and effort when you need to assign multiple users with similar permissions and access levels.
To use this feature, you need to select an existing user from the Users page, and then click on the Duplicate icon on the right side. You will be prompted to enter a new Login name, email address, and password for the new user. Once you click the Create button, the new user will be created and added to the Users list.