Team Management
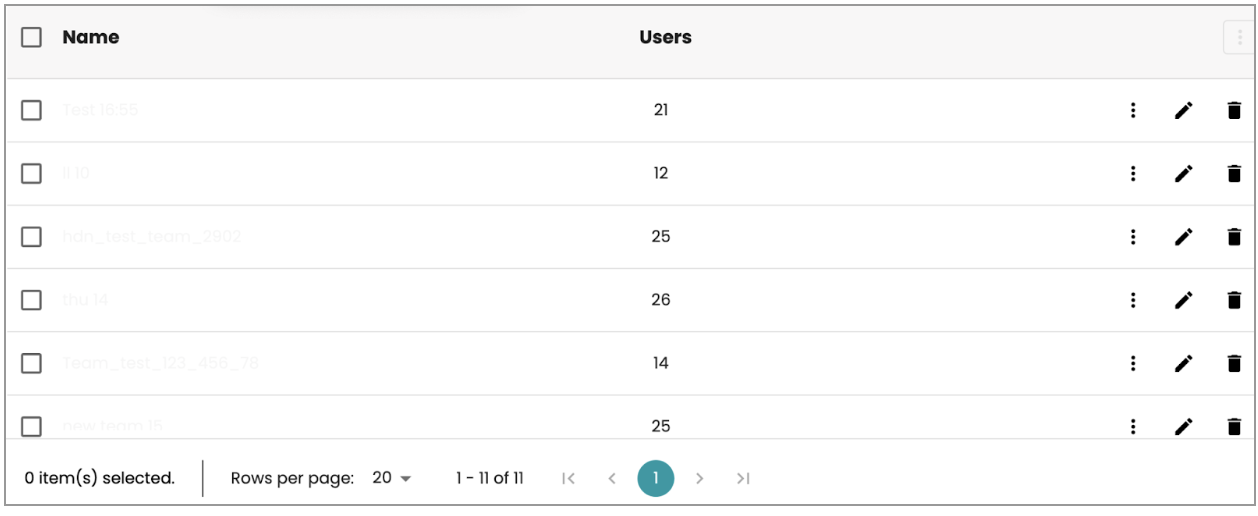
You can see a list of all teams in the system by clicking on the Teams section from the navigation menu.
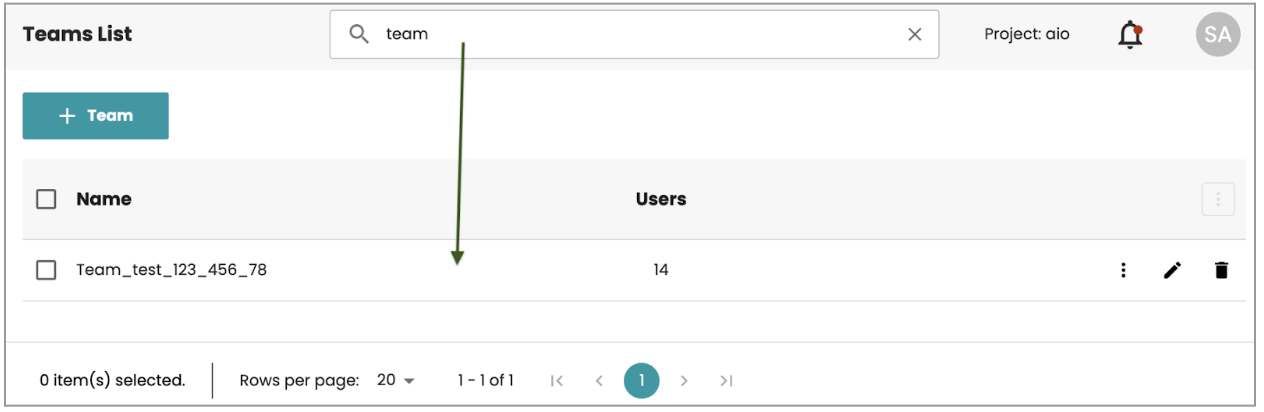
Searching for Teams
You can find Teams by starting with the Search bar on the header when landing on the Teams screen. Start entering the name of the teams you wish to search for. The result is returned in the same table.
Sorting for Teams
By default, team names are ordered by their latest update times. You can manually click on the column header to sort them alphabetically for a different view option.
Creating Teams
Team can be created in AdminUI in order to create the Teams you need within your application.
By clicking "+ Team", you can create a new team within the AdminUI application.
Selecting this button will take you to the add a new team screen with 2 steps.
Step 1. Info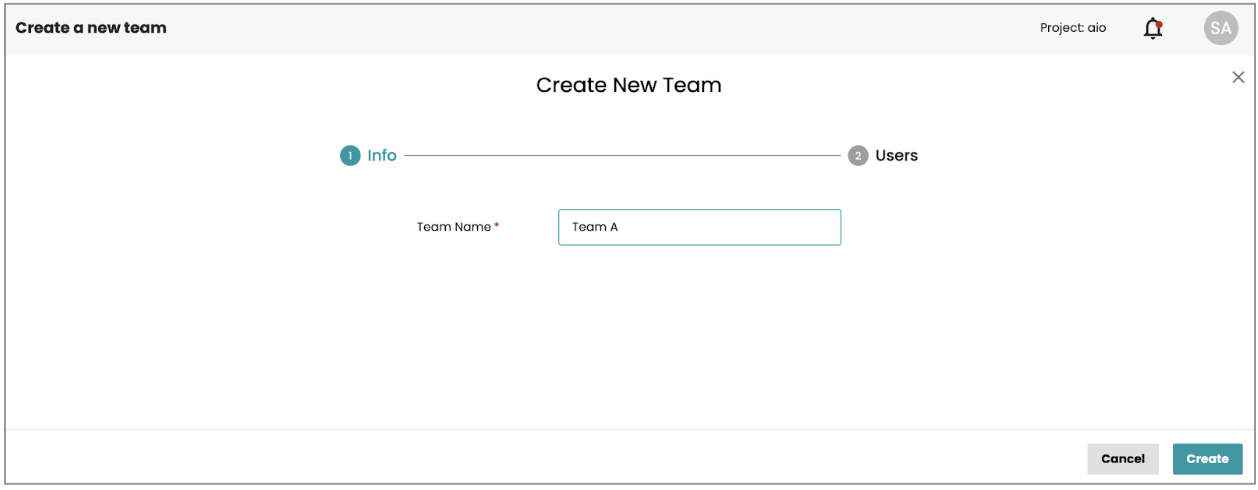
There is a simple Team Name field. Once you hit the “Create” button, you should see a success notification, or you will be informed of any issues. Then it will redirect you to the Assign Users screen.
Step 2. Assign Users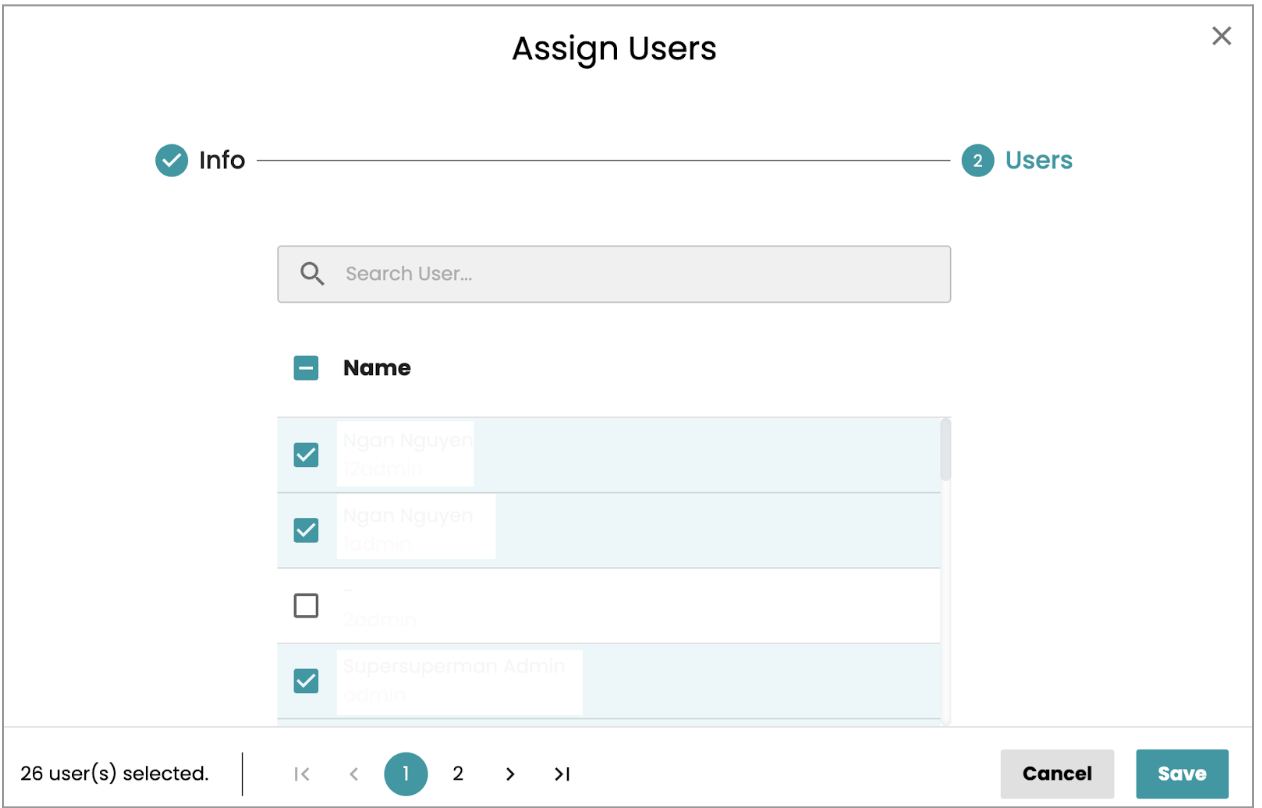
This is an optional step, you can skip it and revisit it later or you can start to select some users to assign to the created Teams. Once you hit the Save button, you should see a success notification, or you will be informed of any issues. Then it will redirect you to the Teams list with the focus on the created Team showing on the top of the page.
Editing the team
Access the team details screen by finding the team that you want to edit in the Teams list, then clicking on the edit icon on the right corner.
This will take you to the dialog on the right side, where you can edit the required team details.
You will notice that there are 2 tabs explained below.
Info tab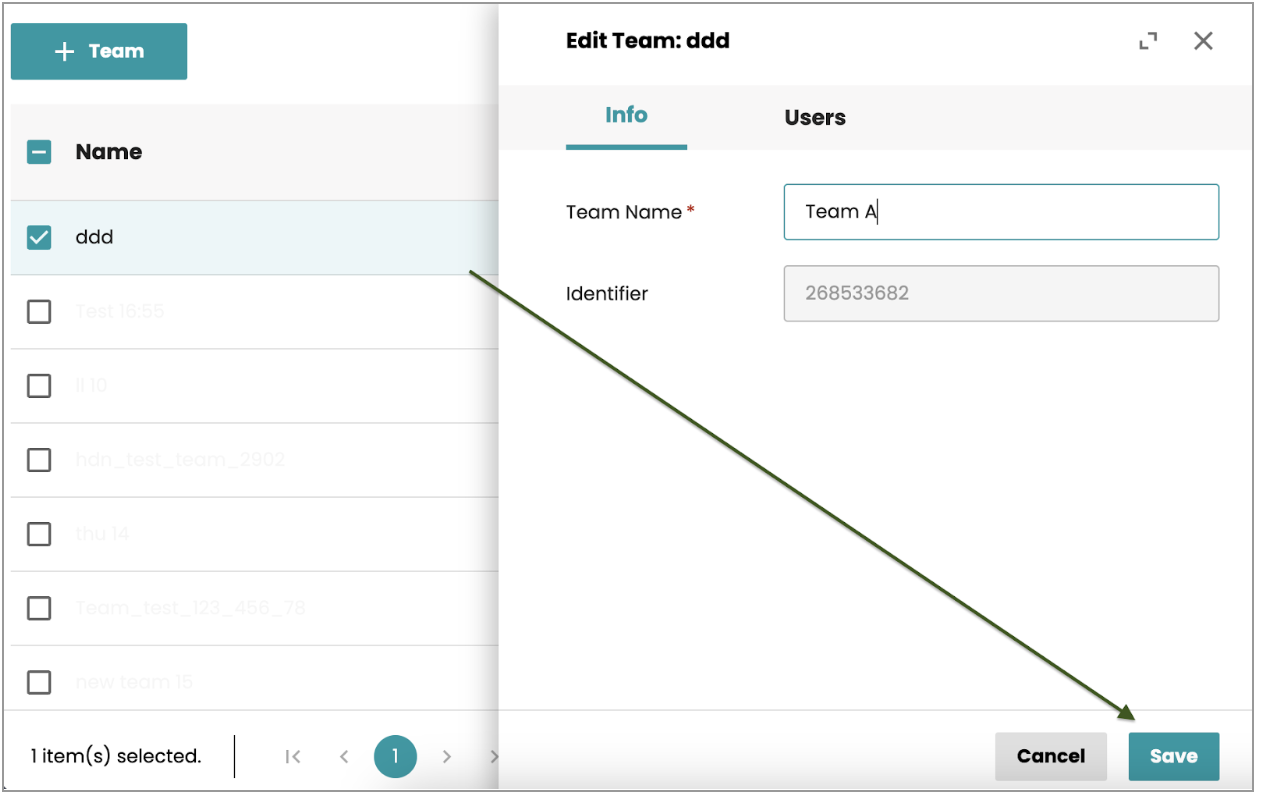
The default tab is the "Info" tab, where you will see the Team Name and Identifier in read-only mode, and be able to edit the Team Name element of the selected team.
Once you have successfully made the edits you require, click Save, and you should then see a success message informing you that your changes have been saved.
Users tabClicking on the Users tab allows you to assign users to the selected team. Using this screen you can assign available users to this team, by checking the checkbox for the selected users from the list.
To un-assign users from the selected team, uncheck the checkbox next to the team name you want to remove and hit the Save button to save the change. Once you hit the Save button, you should then see a success dialog informing you that your change has been updated.
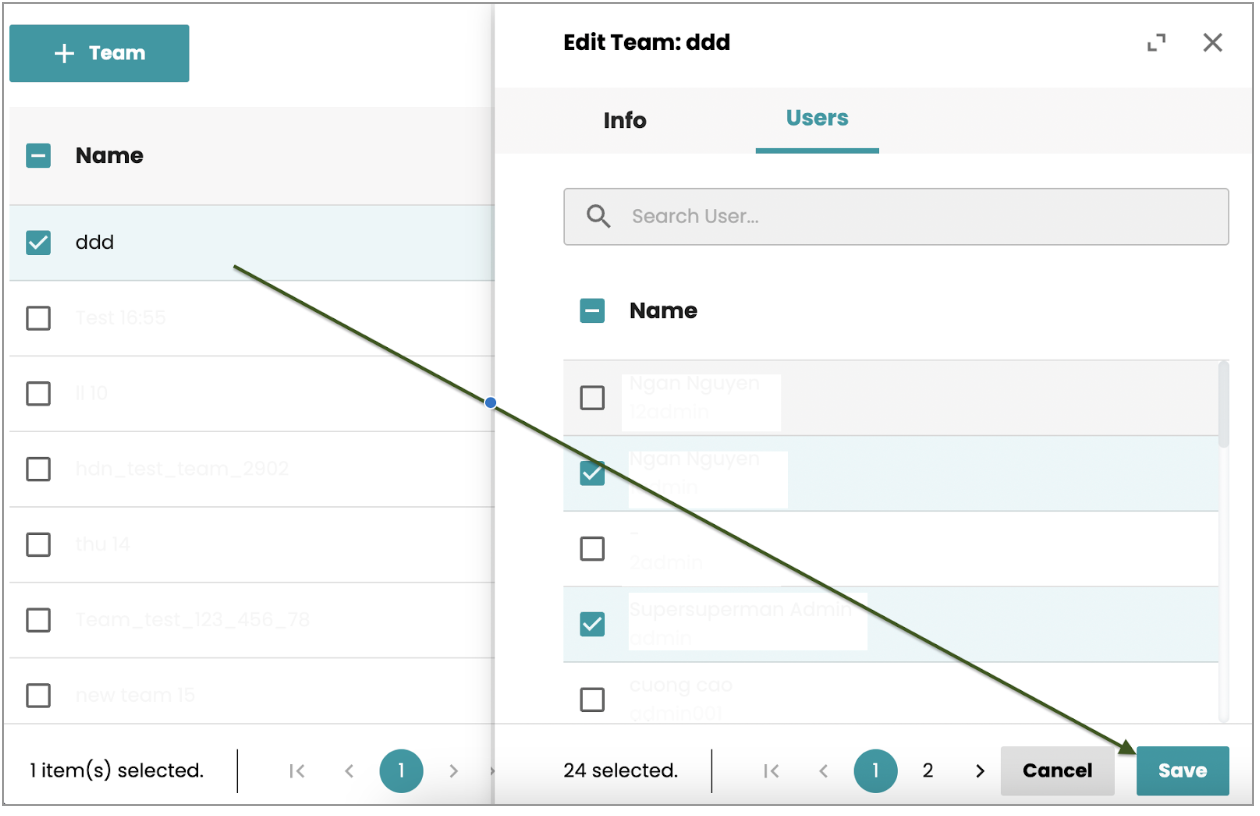
Once you close the dialog, the teams page reloads with the change updated. Once you close the dialog without saving any change, the Unsaved Change popup will display asking you to save before leaving.
Deleting the teams
If you choose to delete a team from the Teams page, click the delete icon on the right side. You also can delete multiple teams at a time by selecting teams on each checkbox, then clicking on three dot icon on the top right of the table and choosing the Delete icon.
You should then see a dialogue warning you that you are going to delete the team(s). At this point you can either cancel, or continue with the delete. If the deletion of a team has been successful, a confirmation message will appear.