Roles Management
This feature enables you to create and define different roles across the priint:suite, such as all rights, administrator, designer, etc. Refer this link to see standard roles overview.
With this feature, you can also set the rights and permissions for each role. And it allows you to assign the roles to the related users, so that they can access the priint:suite application with the appropriate level of authority and functionality.
Creating Roles
By clicking "+ Role", you can create a new role within the AdminUI application.
Selecting this button will take you to the add a new role screen with 2 steps.
Step 1. Info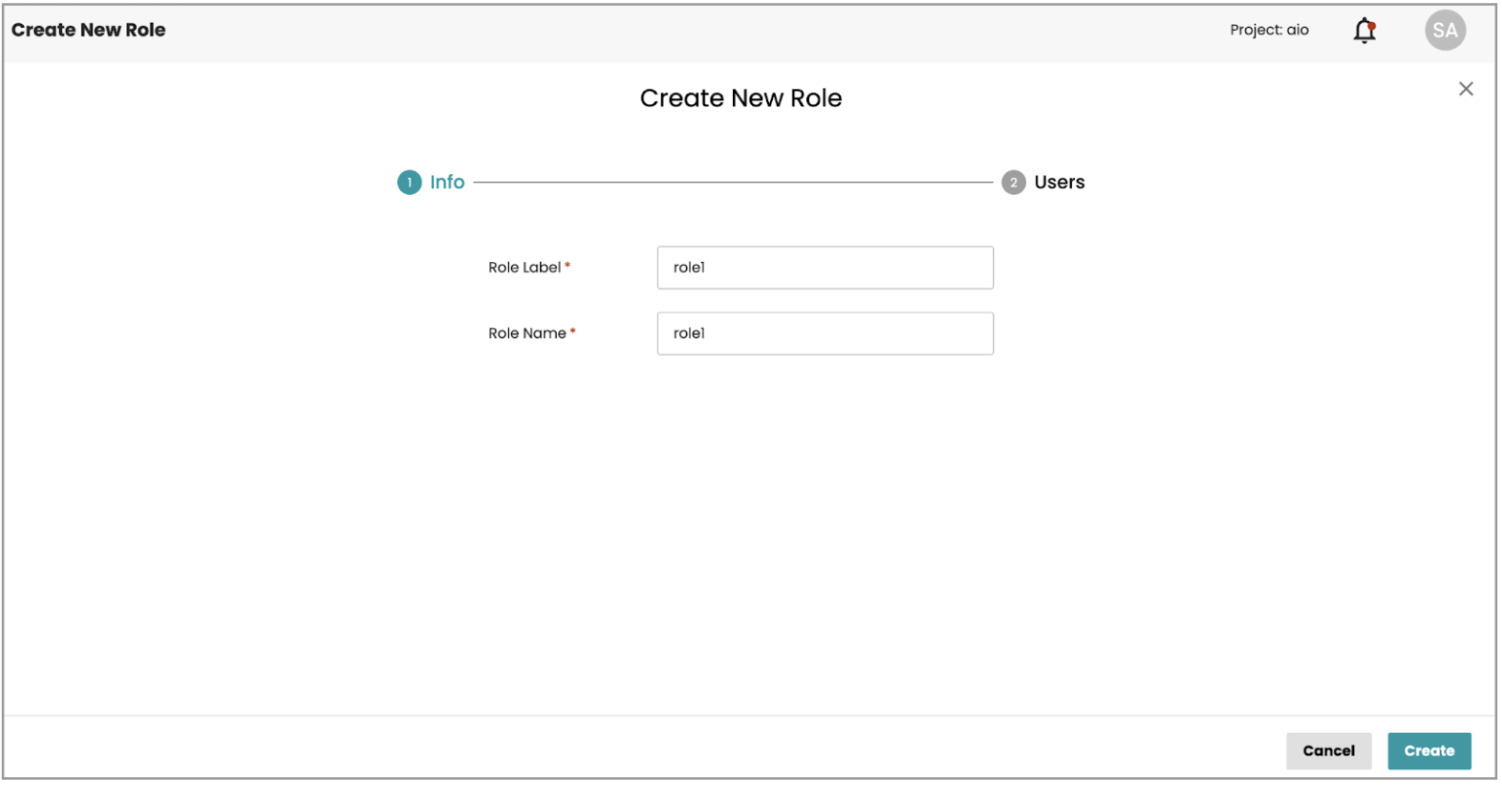
There are Role Label and Role Name fields. Role Name is the unique identifier. When you enter a value into the Role Label field, the system automatically populates the Role Name field with the same value.
Once you hit the “Create” button, you should see a success notification, or you will be informed of any issues. Then it will redirect you to the Assign Users screen.
Once you hit the “Create” button with a Role Name that already exists in the database, you will be informed that the given name exists. You need to update it to another name in order to save it successfully.
If you drop here and return to the Roles list, that role will have a tooltip highlighting that 'No right has been selected for this role yet.'. It also displays the 'Assign CTA' button indicating that you need to click on it to assign users.
Once you click the button, you will be redirected to the “Users” tab on the right panel."
Step 2. Assign Users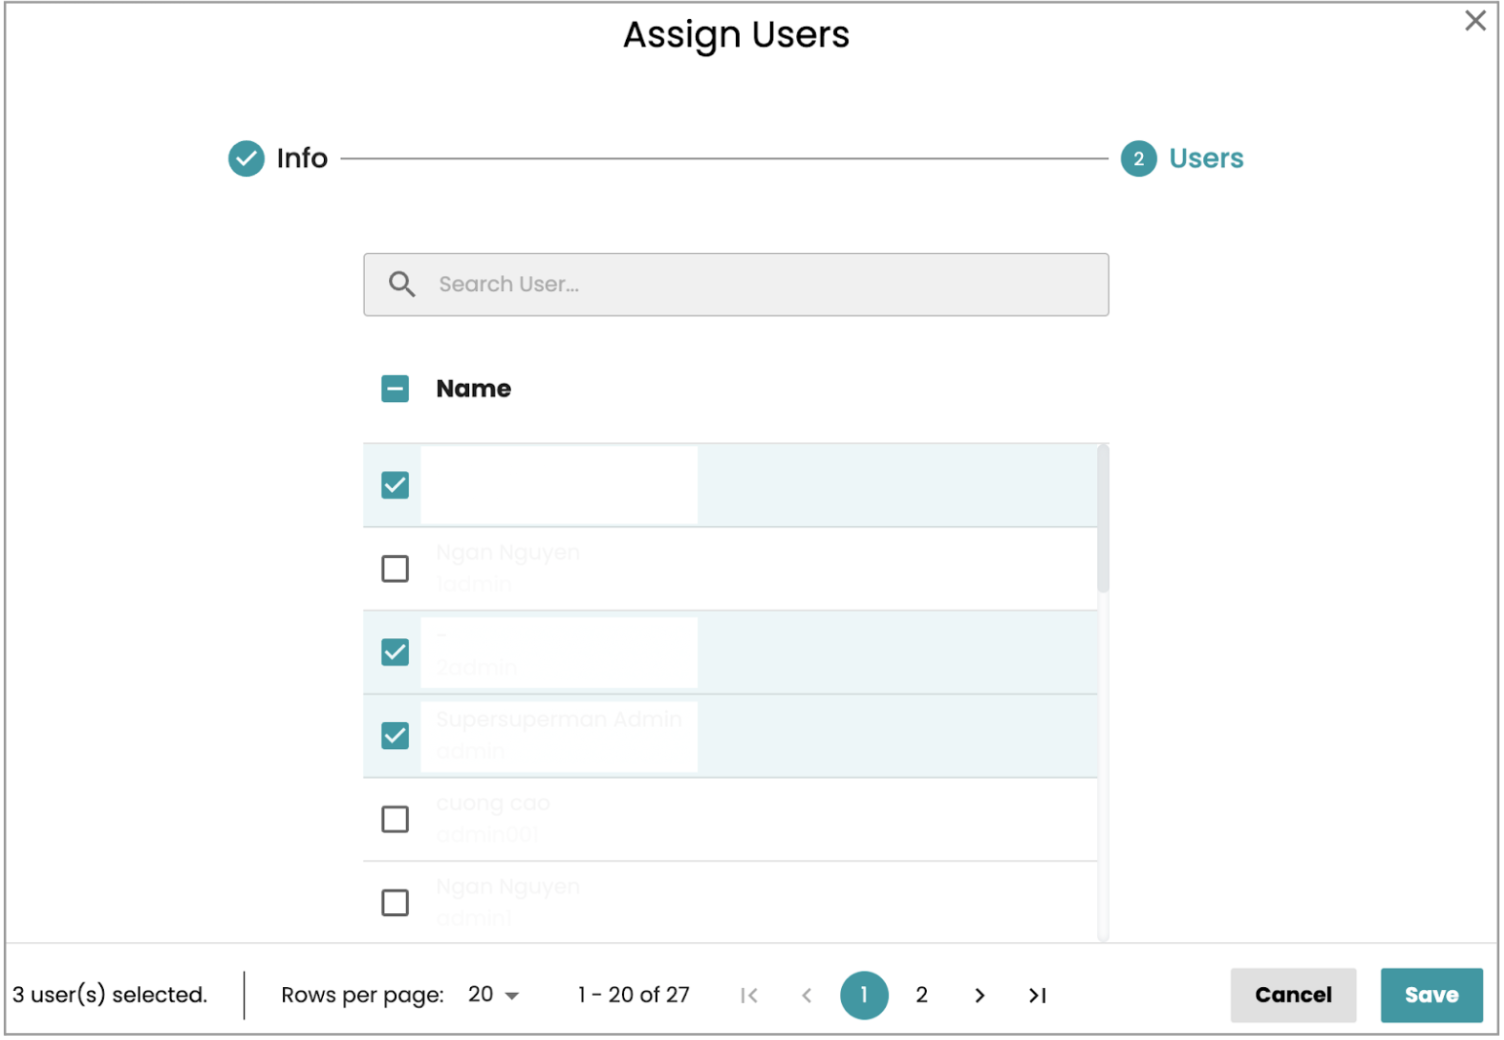
This is an optional step, you can skip it and revisit it later or you can start to select some users to assign to the created role. Once you hit the Save button, you should see a success notification, or you will be informed of any issues. Then it will redirect you to the Roles list with the focus on the created role showing on the top of the page.
Duplicating the role
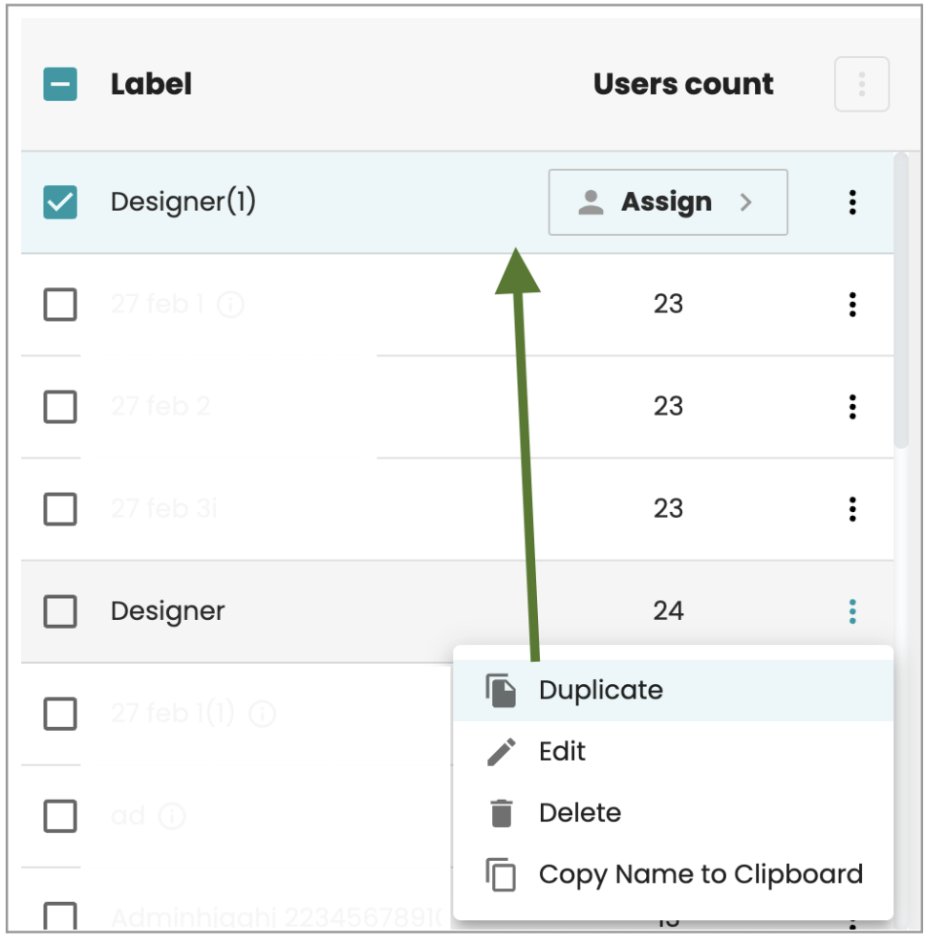
This option allows you to create a new role with the same level of access and permissions as the selected role. This can save you time and effort when you need to create multiple roles with similar permissions and access levels. To use this feature, you need to select an existing role from the roles page, and then click on the Duplicate icon on the right side. Then, the new role will be created and added to the roles list.
At this stage, no user should be assigned to that role. The "Assign CTA" button indicates that you need to click on it to assign users. Once you click the button, you will be redirected to the "Assign users" tab on the right panel.
Searching for Roles
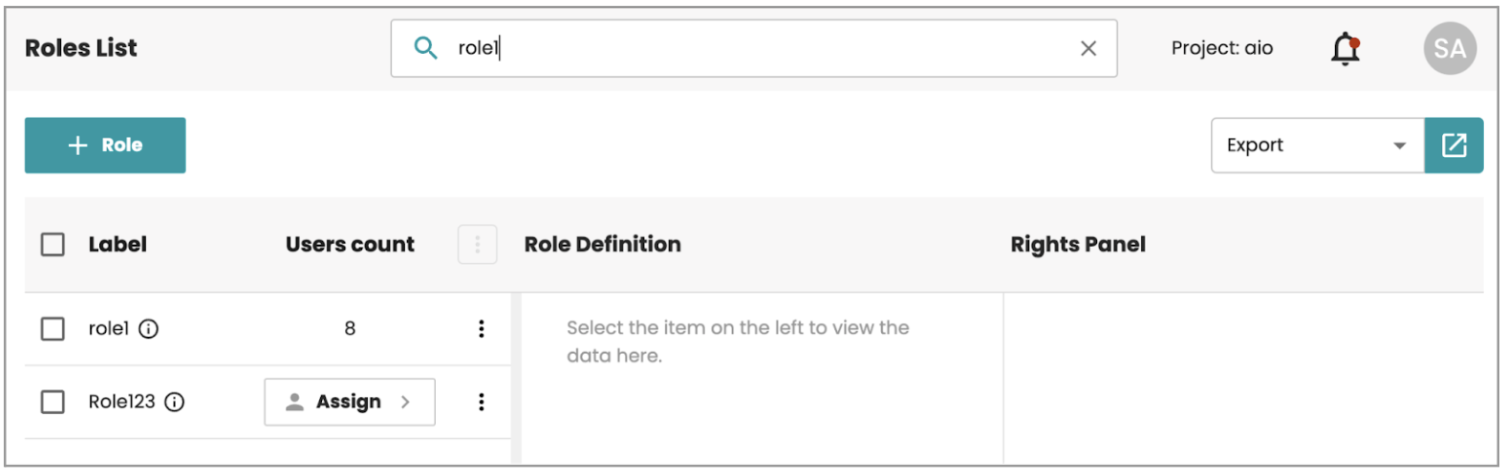
Start typing the keyword of the role name, the role will appear if there is a match.
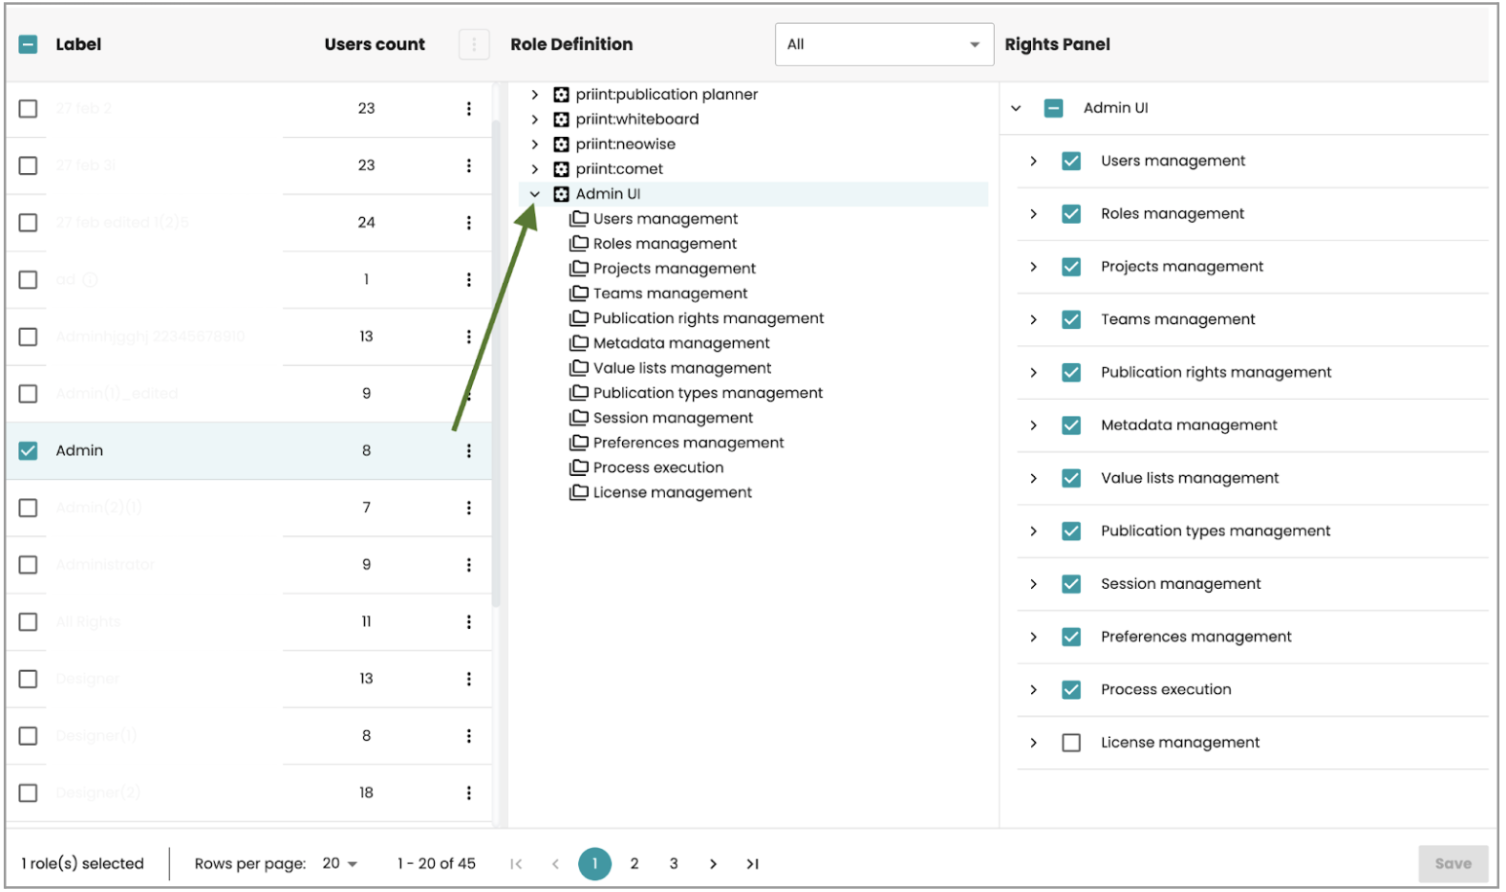
Role definition
Each role has a set of predefined role definitions that specify the functions and tasks that the role can perform. Depending on the purpose of the role, each role definition can have different rights that grant access to certain features and resources across the priint:suite.
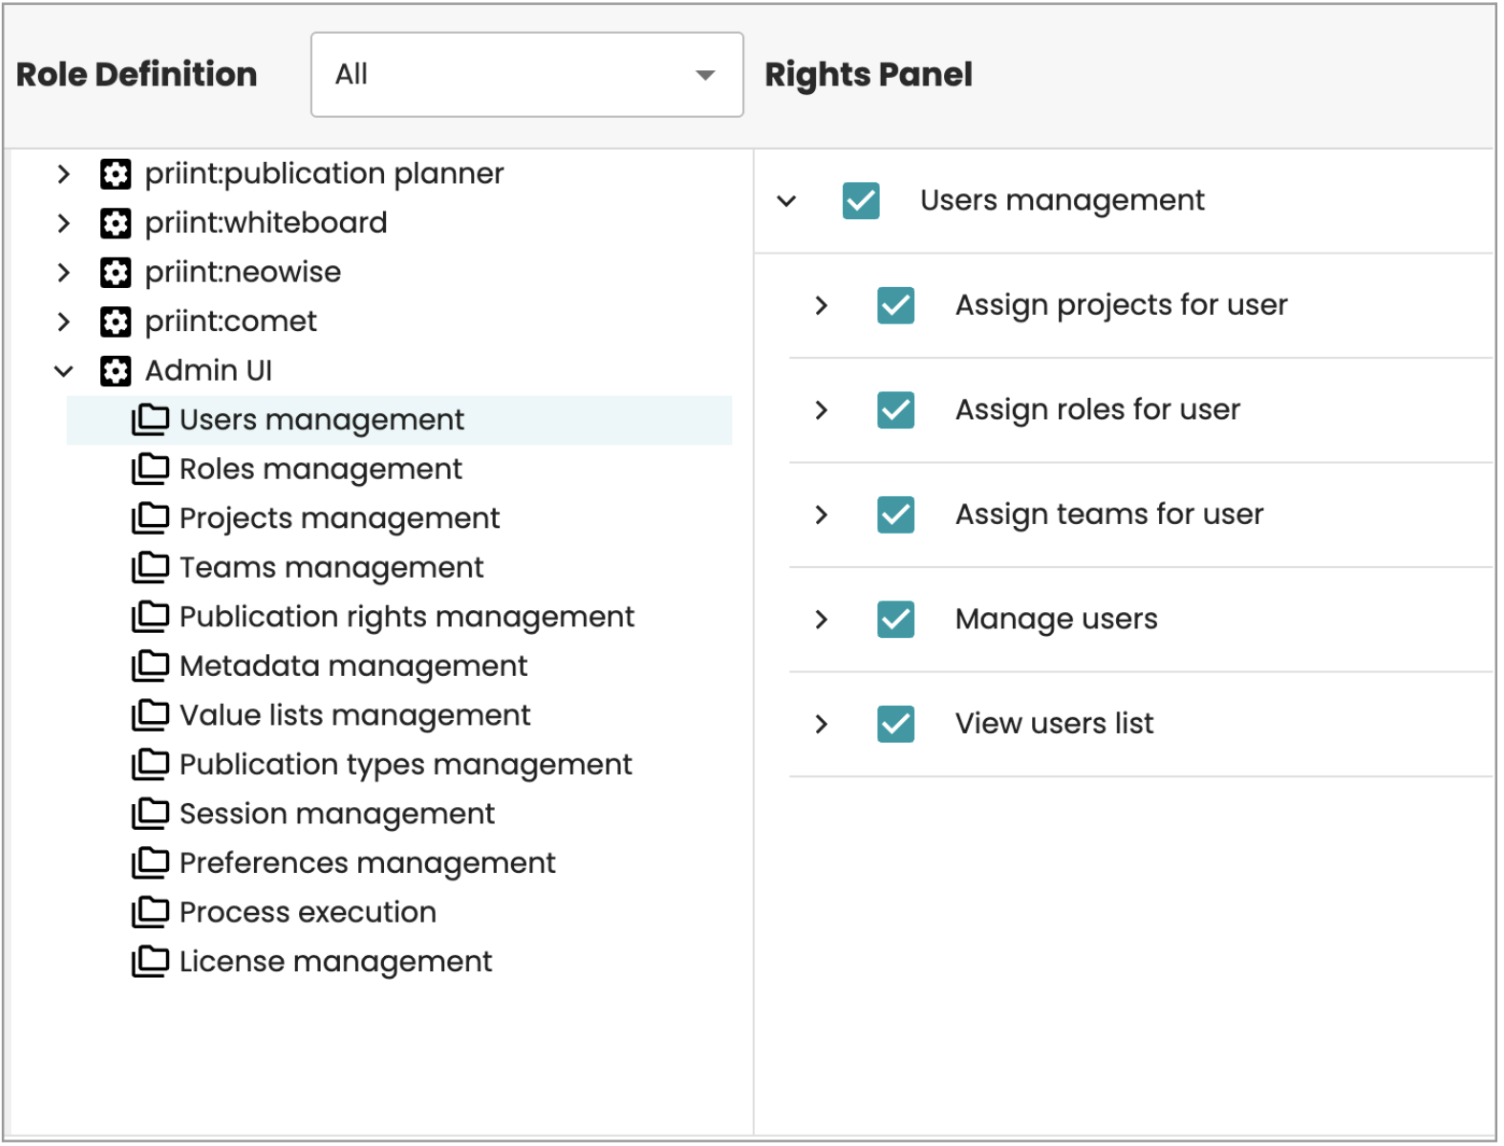
For example, a role definition for View users list and managing users on the Admin UI can have rights to create, duplicate, edit, reset password and delete any users from the users list. You can customize the role definitions and rights for each role according to your needs.
Filter for Role definition
It provides a filter option next to the role definition of each selected role.
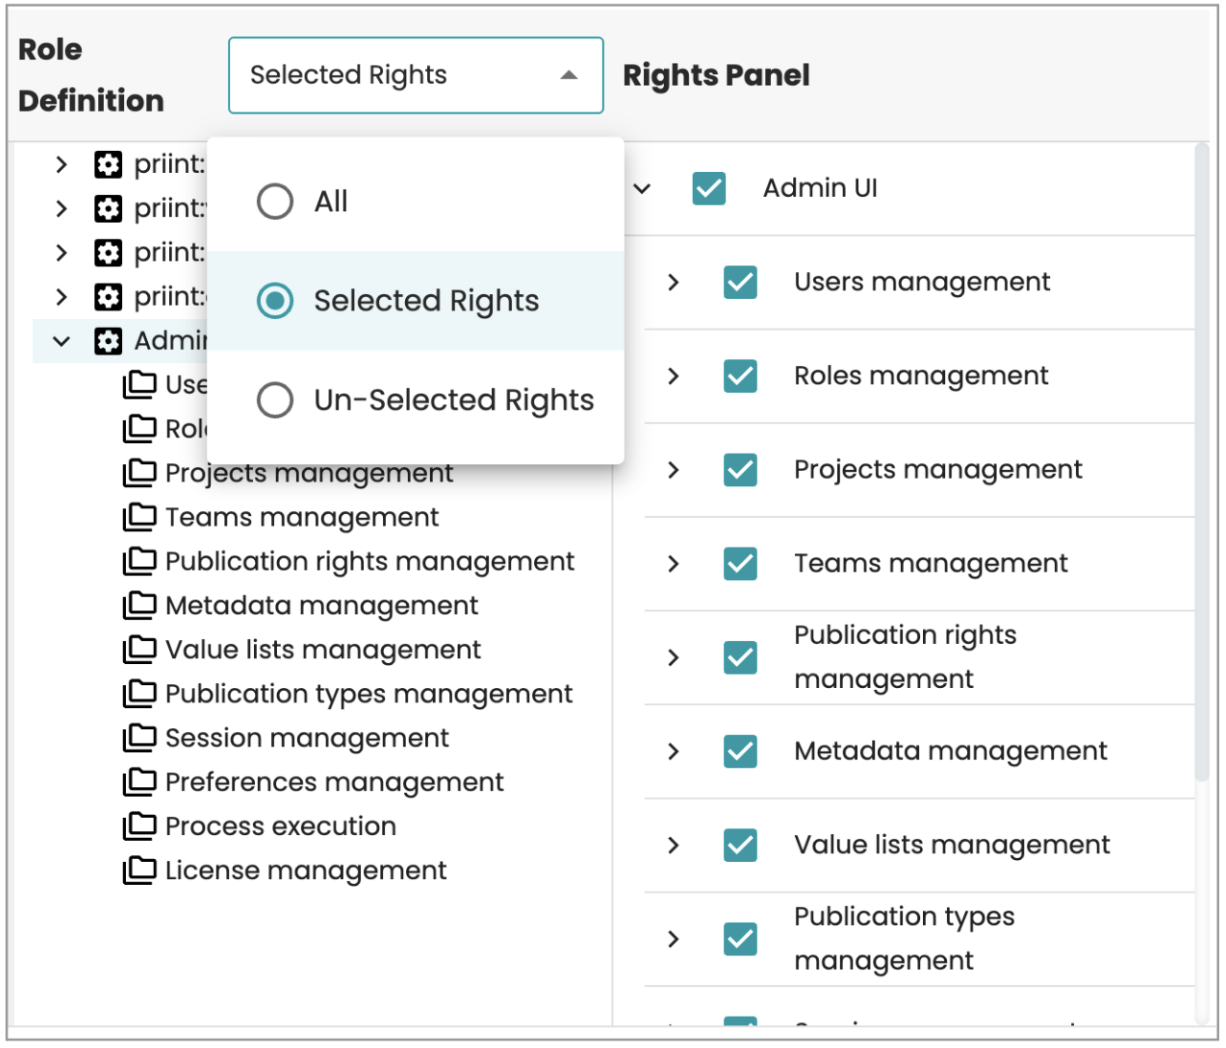
It allows you to choose one of two criteria to filter the role definition of the selected role (Selected Rights or Unselected Rights). It displays the “All” option by default.
When you select one option from the list, it displays only the role definition and rights that match the selected criteria and hides the rest.
Select rights for Role definition
When selecting the role definition, you will see a list of defined rights that control the access level and permissions.
Depending on the purpose of the role definition, each right may have some options to be set, such as read, view, execute, etc. It also displays a description and screenshot if any, you can check or uncheck the checkbox to assign or unassign a right for that role definition.
Editing a role
Access the role details screen by finding the role that you want to edit in the Roles list, then clicking on the edit icon on the right corner. This will take you to the dialog on the right side, where you can edit the required role details. You will notice that there are 2 tabs explained below.
Info tab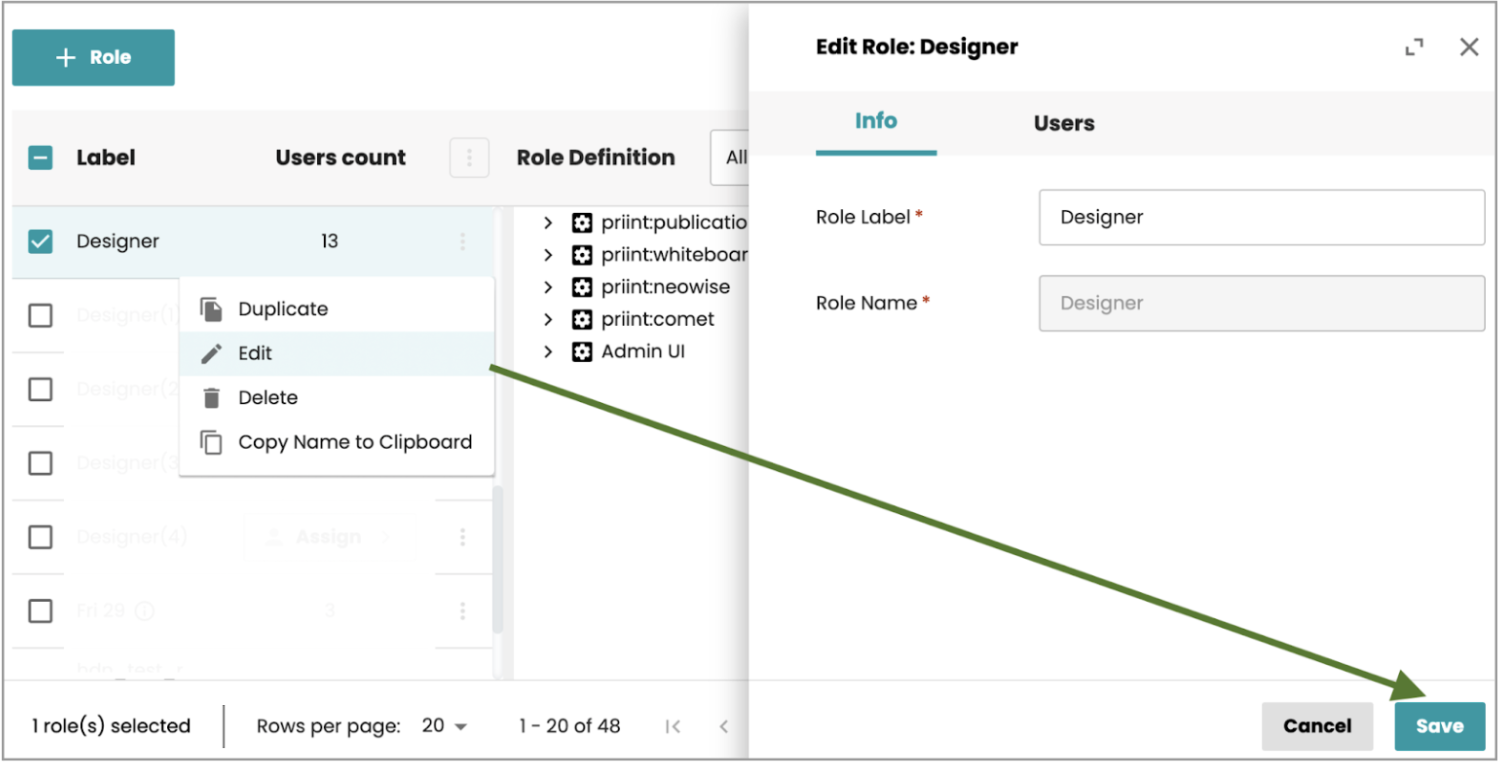
The default tab is the "Info" tab, where you will see the Role Label and Role Name in read-only mode, and be able to edit the Role Label element of the selected role.
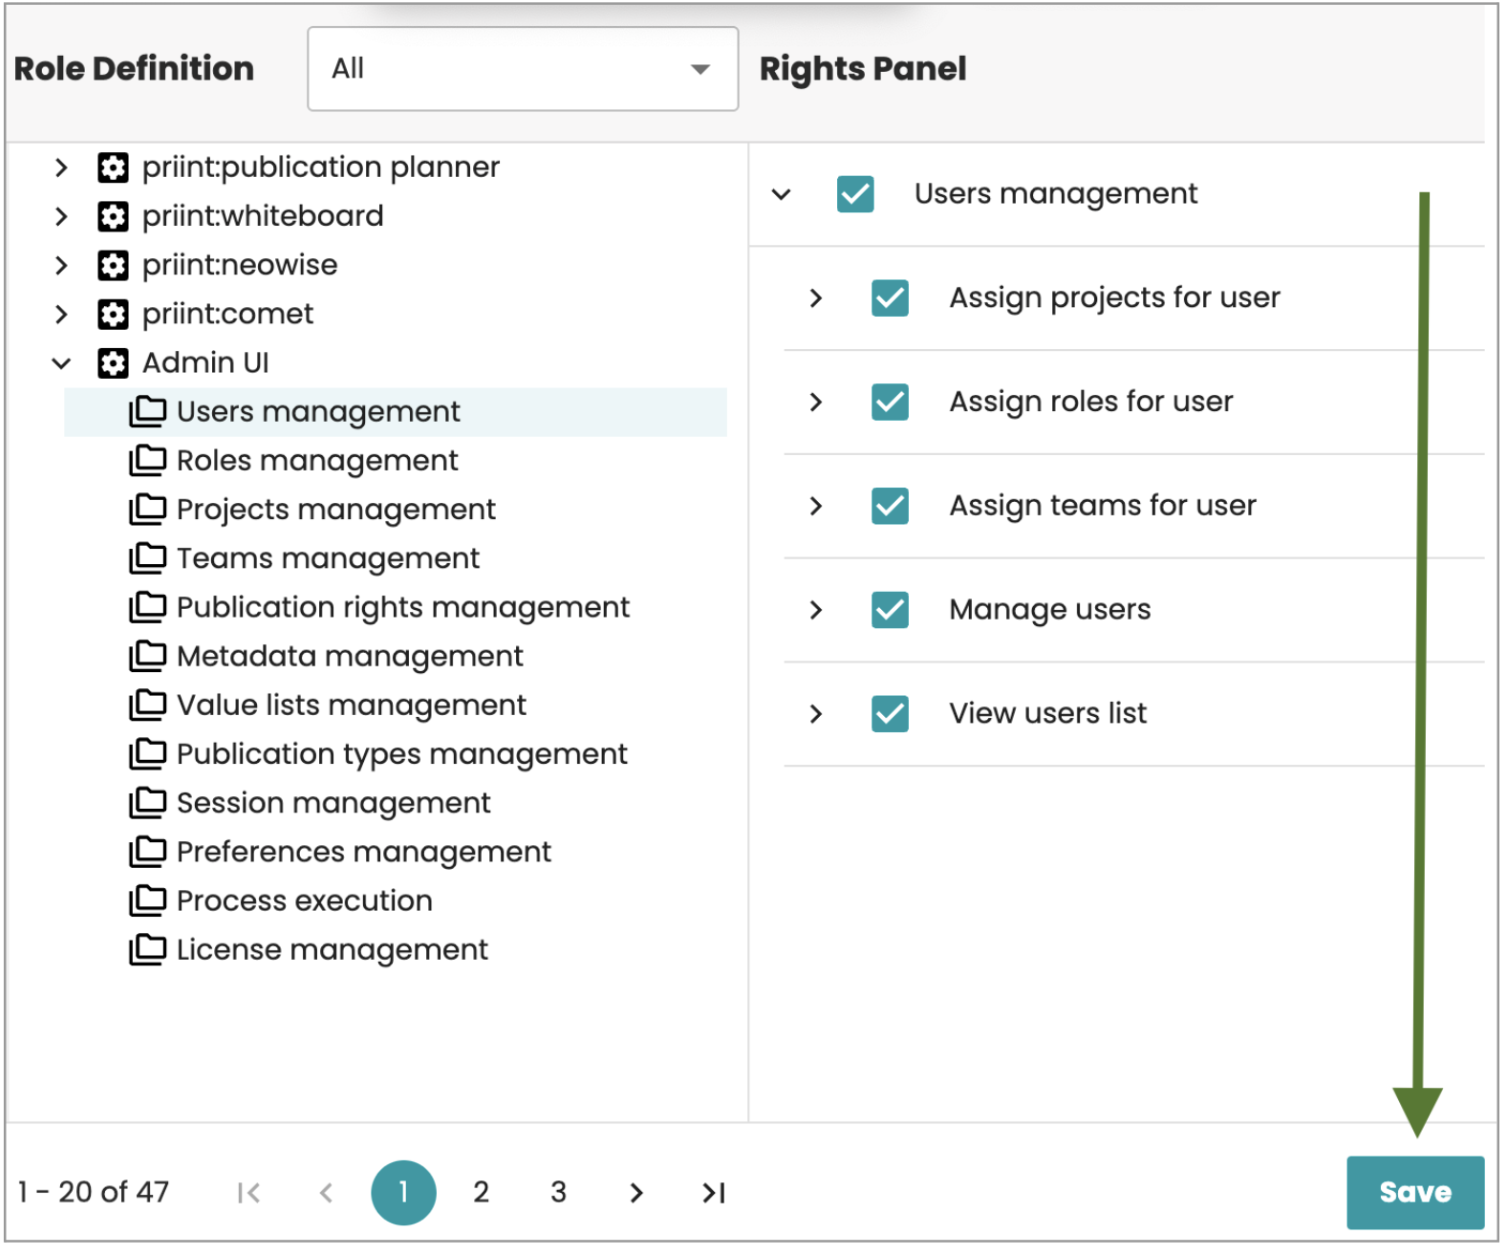
Once you have successfully made the edits you require, click Save, and you should then see a success message informing you that your changes have been saved.
Users tabClicking on the Users tab allows you to assign users to the selected role. Using this screen you can assign available users to this role, by checking the checkbox for the selected users from the list.
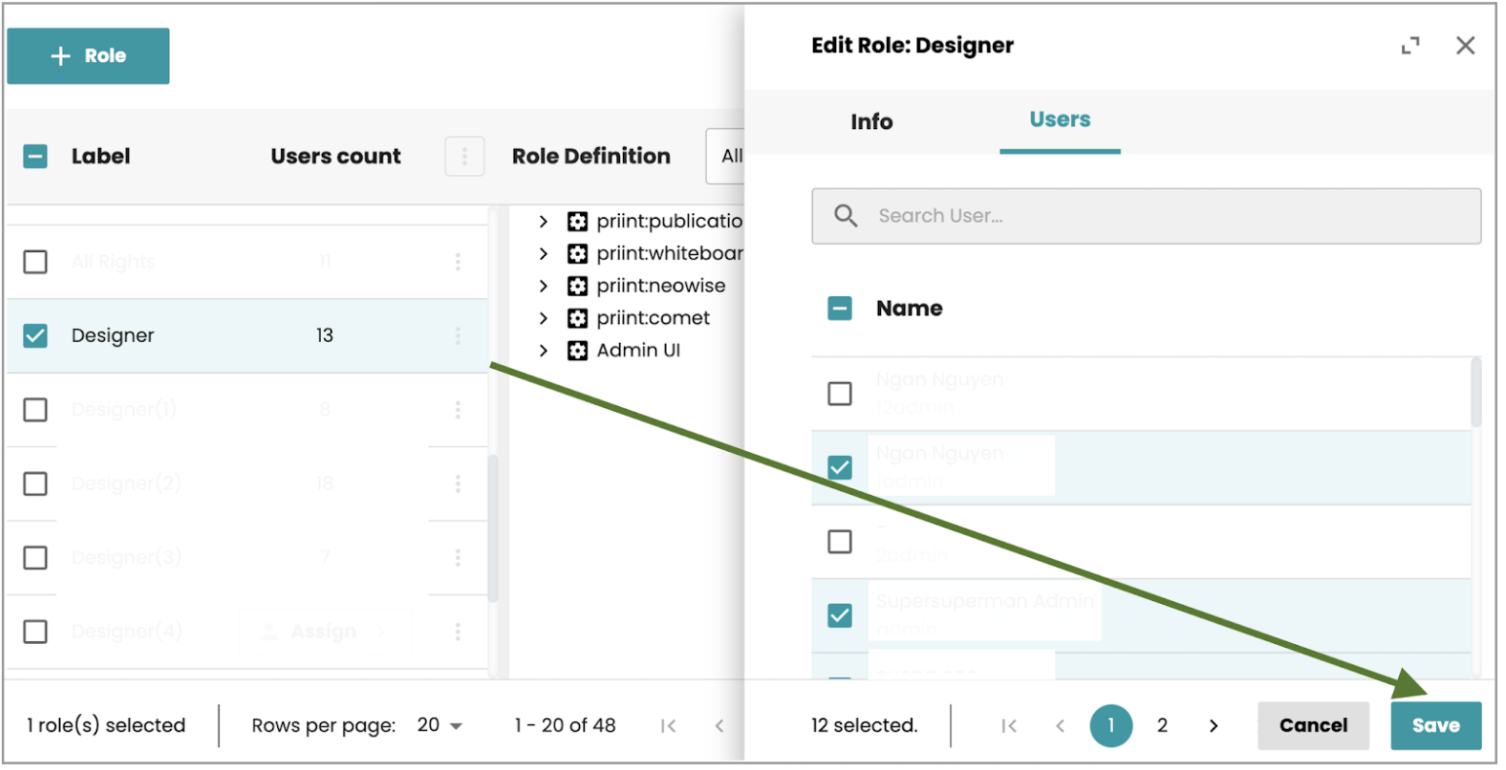
To un-assign users from the selected role, uncheck the checkbox next to the user name you want to remove and hit the Save button to save the change. Once you hit the Save button, you should then see a success dialog informing you that your change has been updated. Once you close the dialog, the roles page reloads with the change updated. Once you close the dialog without saving any change, the Unsaved Change popup will display asking you to save before leaving.
Deleting Roles
If you choose to delete a role from the roles page, click the delete icon on the right side. You also can delete multiple roles at a time by selecting roles on each checkbox, then clicking on three dot icon on the top right of the table and choose Delete icon.

You should then see a dialogue warning you that you are going to delete the roles(s). At this point you can either cancel, or continue with the delete. If the deletion of a role has been successful, a confirmation message will appear.