Metadata Management
A metadata is a collection of predefined attributes used to describe and categorize publications and documents.
Metadata list
You can view lists categorized as 'Active' (currently in use) and 'Trash' (deleted items). You can easily restore metadata lists from the Trash if needed.
Creating metadata
From the Metadata page, click the "+ Metadata" button. This will open a screen with three steps required to create a new metadata.
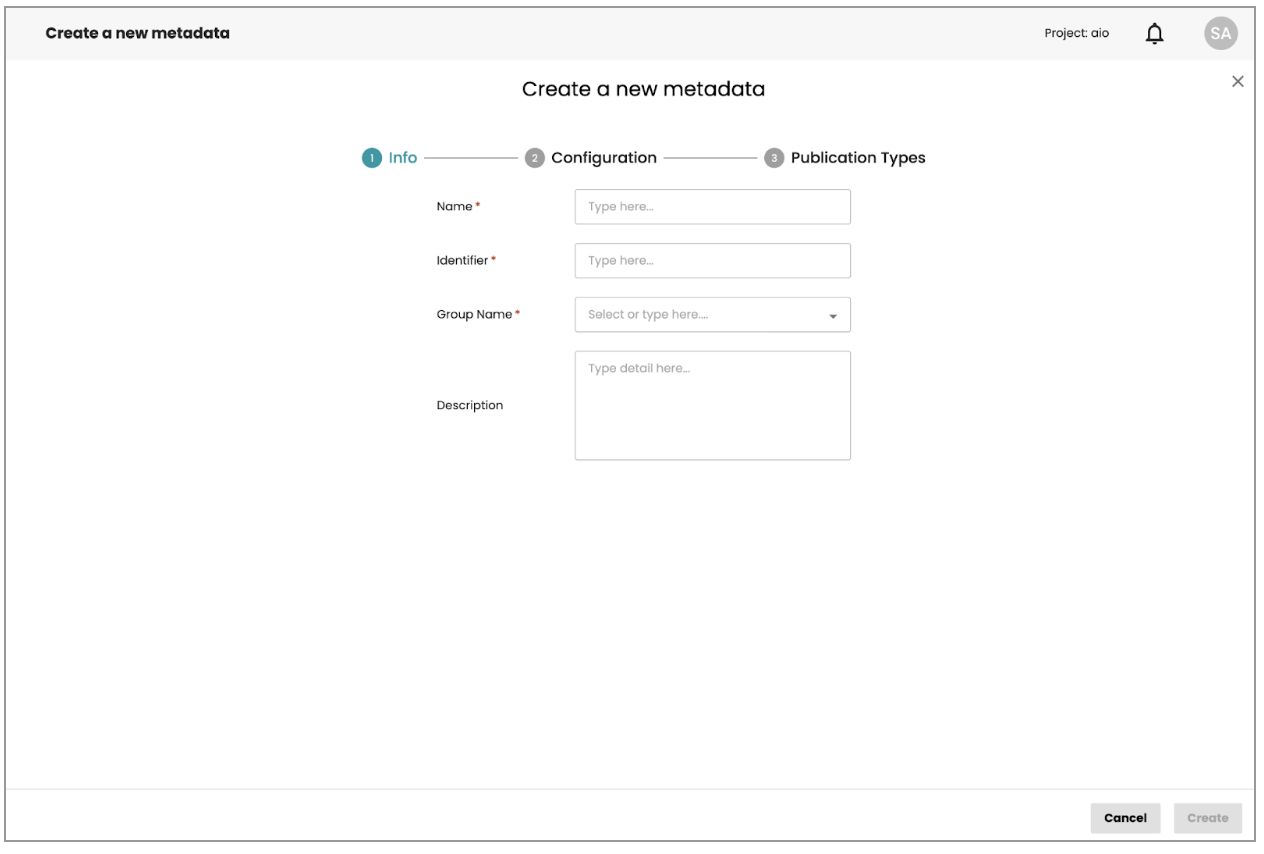
Fill out the relevant Metadata details, including: Name *, Identifier *, Group Name *, Description, Fields Validation You cannot add a new metadata entry until all required fields are validated.
For the "Group Name" field, you can select a group from the available list or type a new name directly in the dropdown.
Once you have entered all required information, click "Create" to create the new metadata entry.
Selecting "Create" will take you to the Configuration info screen. If successful, you will see a success notification, or you will be informed of any issues.
At this stage, the type of the created metadata is set as Text Field by default, and you can change it in Step 2.
Step 2: Configuration InfoThis step is optional and can be skipped or revisited later.
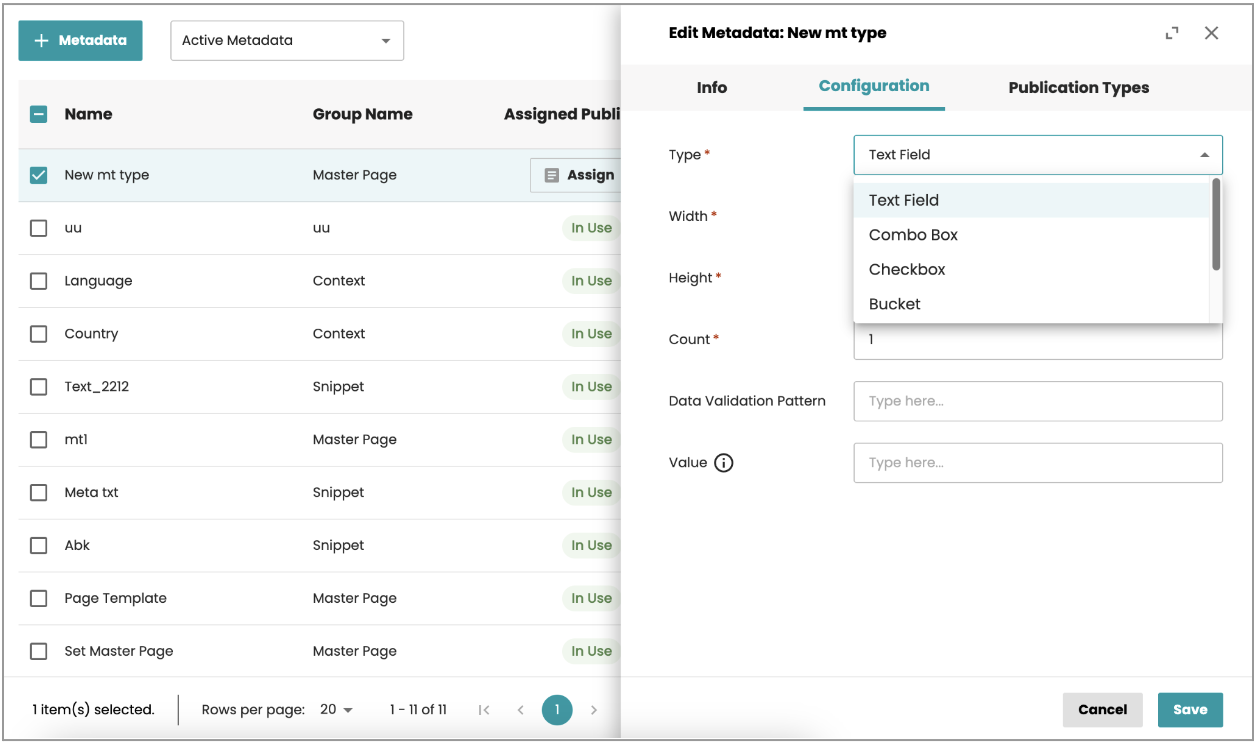
You can start configuring the type for the newly created metadata. Here's a breakdown of the available field types and their configuration options:
1. Text Field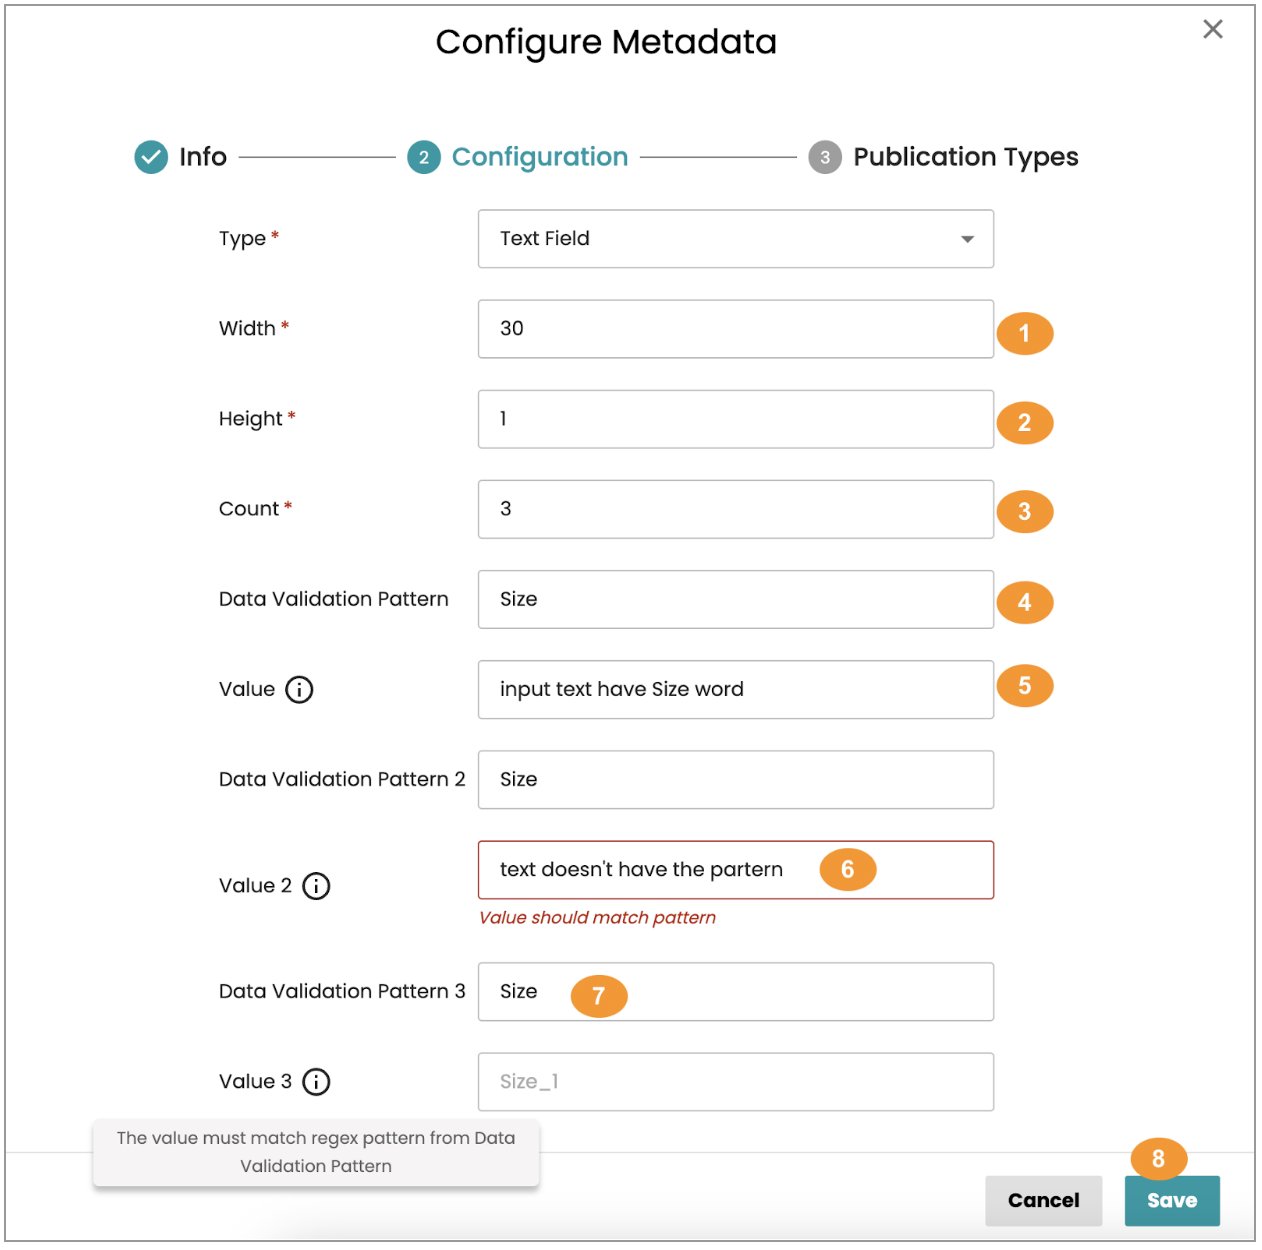
- Width: The width of the text field (default: 30).
- Height: The height of the text field (default: 1).
- Count: The number of text fields displayed (default: 1, with options to choose 1, 2, or 3).
- Data Validation Pattern (DVP): Defines the pattern for valid input. (Optional)
- Value: Defines Name based on the DVP pattern for validation.
- Name: The actual value displayed in the text field.
- Hint Text: Placeholder text displayed when the field is empty.
- Behavior: The "Save" button becomes active only when all fields have valid values.
DVP validates the input against the pattern defined in "Value".
Hint text displays the value from "Value" or the "Name" if "Value" is empty.
2. DateProperties:
Count: The number of date fields displayed (default: 1, with options to choose 1, 2, or 3).
Value_1: Defines the expected date format (dd/mm/yyyy).
Behavior: The "Save" button becomes active only when all fields have valid values.
3. TimeProperties:
Count: The number of time fields displayed (default: 1, with options to choose 1, 2, or 3).
Value_1: Defines the expected time format (hh:mm:ss, min: 00:00:00, max: 23:59:59).
Behavior: The "Save" button becomes active only when all fields have valid values.
4. Combo BoxProperties:
Dropdown: Defines the list of options displayed in the dropdown. (Managed in "The Value list space")
Default value dropdown: The pre-selected option (default: "1").
Behavior: Selecting "Create new dropdown" redirects to a separate page for creating a new value list. The "Save" button becomes active only when all fields have valid values.
5. CheckboxProperties:
Value: A checkbox displayed by default as checked.
Behavior: The "Save" button becomes active only when all fields have valid values.
6. BucketProperties:
Value: Displays the Bucket Identifier and Bucket Entity Identifier fields as text fields.
Behavior: The "Save" button is active by default.
Saving and Canceling Clicking "Close" or "Cancel" without saving prompts a confirmation dialog. After clicking "Save," you will see a success notification or any issues. You will then be redirected to the Publication Types screen.
Step 3: Publication Types InfoThis step is optional and can be skipped or revisited later. You can select publication types to assign to the created metadata. The "Recursive" checkbox is currently checked, indicating that the metadata applies to all existing publications, with automatic updates to documents and metadata values.
To assign the metadata to all existing publications with automatic updates, leave the checkbox checked and click the "Save" button, you will be notified when the process completes.
To exclude the metadata from existing publications and prevent automatic updates, uncheck the checkbox and click the "Save" button.
Selected users will be inherited to access sub folders and documents of this publication by default. If you accept this and click Save, the changes you make in this dialog will also be applied to those related child items.
Metadata list on Active mode
You can view a list of existing metadata items, allowing you to edit or delete them individually.
An "Assign" status next to the related item indicates that it hasn't been used in any publication yet. You can assign relevant publication types by clicking on that button, it redirects you to the Publication types tab on the right panel.
Clicking the Delete icon moves the metadata to the Trash.
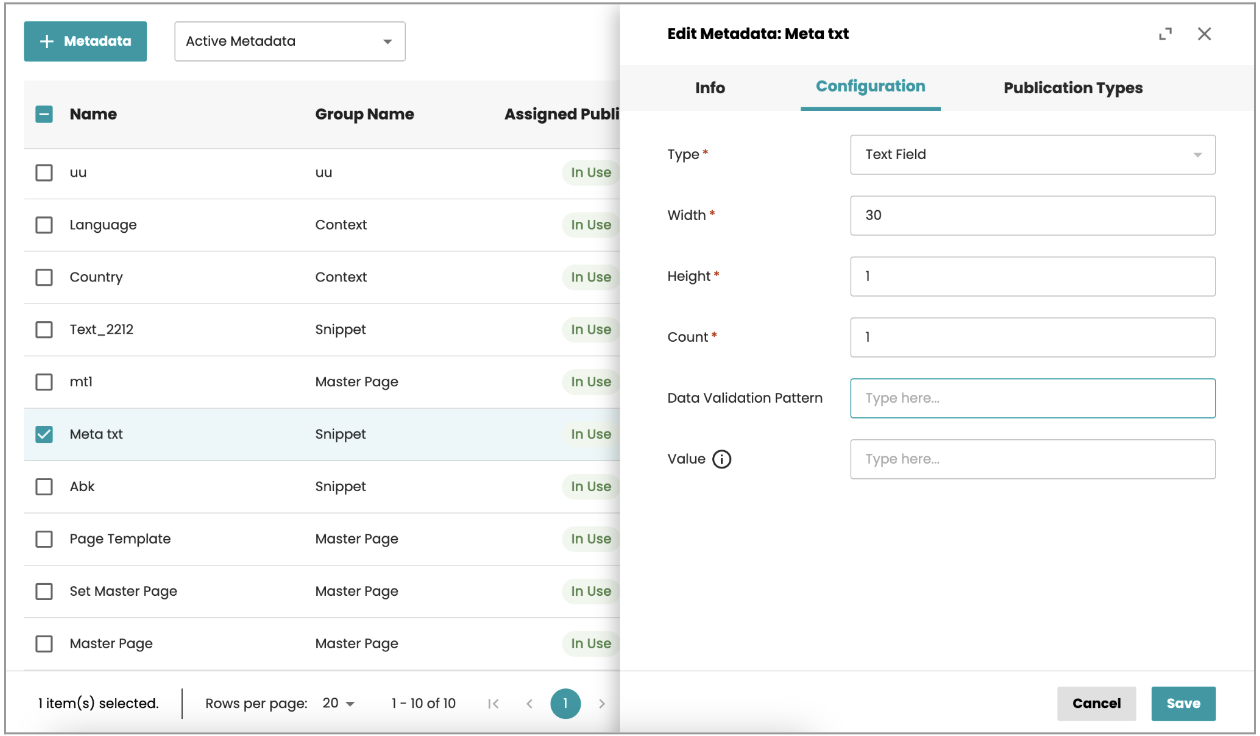
Clicking the Edit icon displays a dialog with three tabs on the right panel. You can edit information on each tab separately.
Metadata list on Trash
This section provides access to previously deleted metadata items ("Trash"). Here, you can:
Restore: Move deleted metadata back to the "Active" list. You can restore individual items using the "Restore" icon next to each metadata item.
The "Bulk Restore" option allows restoring multiple items simultaneously. Clicking this option will display a confirmation message indicating the number of restored items.
Delete permanently: Remove metadata from the system completely. This is only possible if the metadata is not associated with any publications (publication count value = 0).
Bulk Option: If multiple items are selected and some have publications assigned (count > 0), clicking the Delete option will display a confirmation message highlighting that only metadata not assigned to publications can be deleted.
You can also restore, or copy IDs to the Clipboard for multiple metadata items at once by selecting desired metadata items using the checkboxes. Then, click the three-dot menu icon in the top right corner of the table. Choose the desired action ("Restore" or "Copy IDs to Clipboard") from the menu.
Editing metadata
You will notice that there are 3 tabs explained below.
Info tabThe default tab is the "Info" tab, where you will see Name, Identifier in read-only mode, and be able to edit the following elements of the selected metadata: Group name, Description.
Once you have successfully made the edits you require, click Save, and you should then see a success message informing you that your changes have been saved.
Scenario 1: Metadata is applied to publication types, and you may want to update the specifications of the selected metadata type.
You can update the specifications of the selected metadata type even after assigning publication types. If the selected metadata has already been applied to at least one publication type, its values can be edited in this step. The Save button will also become active in this case.
This logic applies only to selected metadata that has been saved previously. You cannot change to a different metadata type.
Scenario 2: Metadata has not been applied to publication type
If the selected metadata has not been assigned to any publication types yet, you can edit all available fields in this step.
Once you have successfully made the edits you require, click Save, and you should then see a success message informing you that your changes have been saved.
Publication Types TabThis optional step allows you to assign or unassign publication types from the created metadata.

Assigning Publication Types: select the desired publication types from the list.
The "Recursive" checkbox determines how the metadata is applied:
Checked: The metadata applies to all existing publications, with automatic updates for documents and metadata values. Click "Save" to initiate the process and be notified upon completion.
Unchecked: The metadata excludes existing publications and prevents automatic updates. Click "Save" to confirm.