Best Practice: priint:suite behind an Apache Reverse Proxy
1 Introduction
Having an application server serving its applications freely over the internet isn’t always the best of ideas, since all application servers are prone to attacks from the outside. So, it would be a good idea to mask your application server using a reverse proxy configuration to simply hide the fact that you’re having a Java application server in the background. This also enables you to restrict access to certain IPs, for example. In this documentation, we will look at how we can easily set up a reverse proxy on Ubuntu and Windows and how you can configure it to communicate with the priint:suite.
We propose that you block the connections to the direct ports of Payara/Glassfish for everything except the reverse proxy. Just make sure you know how to remove the block again.
2 Prerequisites
This article focuses on a reverse proxy configured with an Apache web server. The ProxyPass rules used here should also be usable with other web servers, since the endpoints you want to connect to will be the same.
Download the Windows version of Apache here: Using Apache HTTP Server on Microsoft Windows - Apache HTTP Server Version 2.4

Just choose one of these mirrors.
The Ubuntu version of Apache can be acquired through the APT Package Manager. You need to have valid certificates ready to use. These are normally either one or several .crt files (certificates) as well as one .key file (private key to the certificate). At least one .crt file as well as the .key file are necessary.
3 Example Configuration Files
Additionally, we provide you with sample configurations that you can use.
- Apache_ReverseProxy_Win.zip for Windows
- Apache_ReverseProxy_Ubuntu.zip for Linux Ubuntu
In the files ps_win_RP.conf/ps_ubuntu_RP.conf you must adjust the following settings:
| Setting | Example Value Windows | Example Value Linux | Description |
|---|---|---|---|
| ServerName | priint.kontoso.com | priint.kontoso.com | This is the server name the reverse proxy will be called by. It is contained twice in the configuration. |
| ServerAdmin | it-support@kontoso.com | it-support@kontoso.com | E-mail of a person being responsible for the reverse proxy. |
| SSLCertificateFile | D:/PriintSuite/Apache24/conf/ssl/kontoso.com.crt | /etc/ssl/certs/kontoso.com.crt | Certificate file. |
| SSLCertificateKeyFile | D:/PriintSuite/Apache24/conf/ssl/kontoso.com.key | /etc/ssl/private/kontoso.com.key | Certificate key file containing the private key to the certificate. |
| SSLCertificateChainFile | D:/PriintSuite/Apache24/conf/ssl/Intermediate_CA_Bundle.crt | /etc/ssl/certs/Intermediate_CA_Bundle.crt | Only needed if the CA of your certificate provided a certificate chain file. Not needed for self-signed certificates. |
| ServerRoot | D:/PriintSuite/Apache24 | Windows only! Root path of your Apache24 installation | |
| DocumentRoot | D:/PriintSuite/Apache24/htdocs | Windows only! Path to htdocs folder | |
| <Directory | D:/PriintSuite/Apache24/htdocs | Windows only! Path to htdocs folder |
The example configuration files assume that reverse proxy and pubserver are on the same machine. We suggest to do this. If in your network they are on different machines, you need to change all rules in the configuration, exchange localhost by the pubserver address.
Please note, that you can decide whether the connection between reverse proxy and pubserver is secured or not. The example configurations use an unsecured connection in the Windows example and a secured one in the Linux Ubuntu example. If pubserver and reverse proxy are on the same system, we propose to use an unsecured connection for performance. If pubserver is on another system, whether you should use https or http depends on the trust you have in the network between the two servers. If it is highly secured, you might use an unsecured connection for performance. Or use a secured connection for additional security.
4 Windows
In this part of the documentation, we focus on how to install and configure an Apache web server to run as a reverse proxy on Microsoft Windows.
4.1 Installation
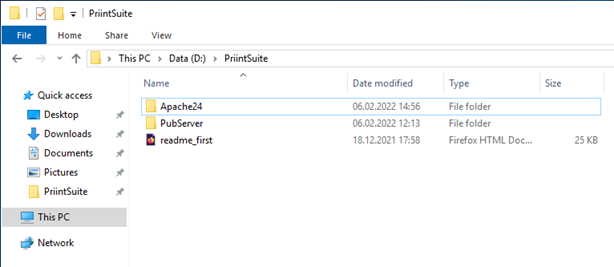
The Apache on Windows comes as a .zip archive. Just unzip it wherever you want. In this documentation, we will use the directory D:\PriintSuite\ to unzip all contents of the .zip archive into. After you unzipped the archive, you get the following directory: D:\PriintSuite\Apache24. This directory will be the working directory of the Apache web server. In case you use a different structure, you will have to change the paths later in the configuration. You can leave it like that or rename it to something else. We will leave it like this. This is how the directories structure looks like after unzipping.
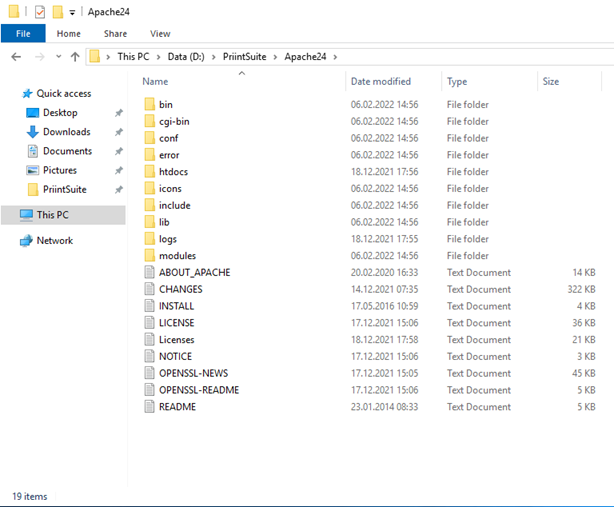
There are some important directories in here:
bin: The main directory of the executable (httpd.exe) and all related important files. You will also find some tools here, for example the Apache monitor.conf: Directory of the configuration files, as well as a folder for the SSL certificates.modules: Here you can find the modules of the Apache web server. Modules are used for server specific functions, for example the reverse proxy module as well as the SSL module. Those modules can be activated in the configuration.
We provide a sample configuration (see3 Example Configuration Files) where you only need to change some directory paths and some general options like "ServerName" and "ServerAdmin". This configuration will work with the priint:suite as long as the Publishing Server is on the same system as the reverse proxy. If you want to use this configuration on a dedicated proxy server, you also need to change the ProxyPass rules as well as the rewrite rule for the web sockets to point to the publishing server address.
The directory paths you need to change are as follows:
- ServerRoot
D:/PriintSuite/Apache24 - DocumentRoot
D:/PriintSuite/Apache24/htdocs <Directory "D:/PriintSuite/Apache24/htdocs">- SSLSessionCache
shmcb:D:/PriintSuite/Apache24/logs/ssl_scache(512000) - SSLCertificateChainFile
D:/PriintSuite/Apache24/conf/ssl/Name_of_Chai_Cert - SSLCertificateFile
D:/PriintSuite/Apache24/conf/ssl/Name_of_Cert_File - SSLCertificateKeyFile
D:/PriintSuite/Apache24/conf/ssl/Name_of_Cert_Key_File
We will provide two configs for the Apache web server on Windows
httpd.conf(the standard Apache configuration – is needed to run the Apache web server)ps_win_RP.conf(the configuration with all configurations regarding SSL, reverse proxy, web sockets)
Both of them are needed to make this work. Unfortunately, the Apache web server needs its standard config named httpd.conf.
We also have to change the paths to the certificates in the configuration (ps_win_RP.conf). The parameters you have to change are as follows:
- SSLCertificateChainFile
- SSLCertificateFile
- SSLCertificateKeyFile
We will use the standard directory here to store our certificates: D:/PriintSuite/Apache24/conf/ssl/
We unzipped the archive earlier to the directory D:\\PriintSuite\\Apache24. First, we want to preserve the original config under D:/PriintSuite/Apache24/conf/. We’re just going to change the ending of the file from .conf to .conf.bak After that, we take the httpd.conf that we provided and copy it to D:/PriintSuite/Apache24/conf/. 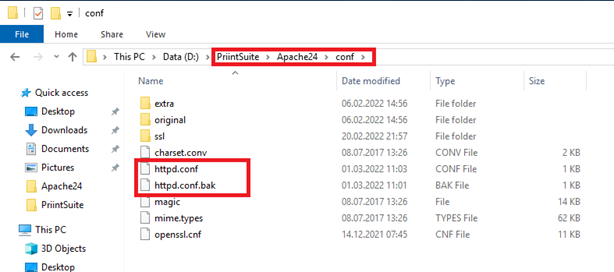
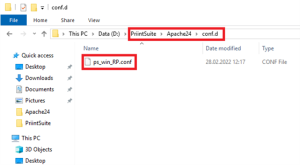
Next, we want a separate directory for the second config (ps_win_RP.conf) For this we will create a new directory under Apache24/ named conf.d
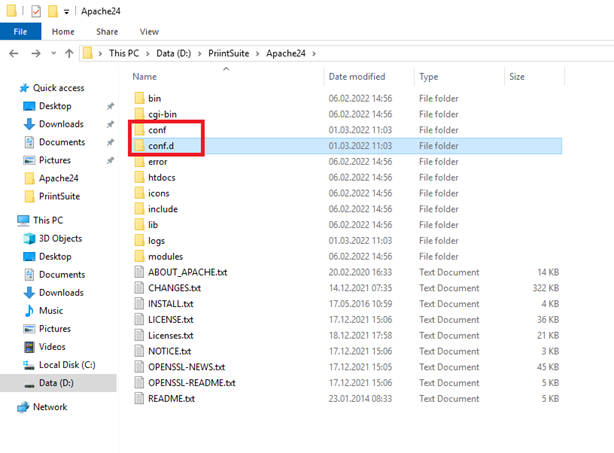
We will copy the “ps_win_RP.conf” into the newly created directory Apache24/conf.d/
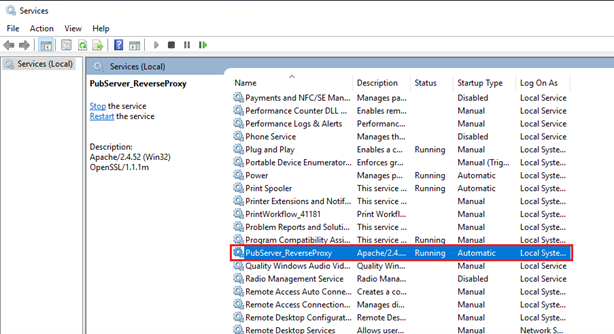
After you changed the ps_win_RP.conf so that it works with your file system, all that is left to create the Windows service so that the reverse proxy starts with the system automatically.
For this, we open a command line in administrator mode and navigate to the Apache24/bin directory.

To create the Windows service, you have to type the following command while you are in the Apache24/bin Directory.
exe -k install -n "PubServer_ReverseProxy"
This will create a Windows service with the name PubServer_ReverseProxy which you will use to start, stop and restart the Apache web server.
5 Linux
In this part of the documentation, we focus on how to install and configure an Apache web server to run as a reverse proxy on Ubuntu 20.04 LTS Linux.
5.1 Installation
The Apache web server on Linux is either available on Apache’s website or directly from the Package Manager apt of Ubuntu. To make things easier, we will use the version from the Package Manager. This will install the web server as well as the service to run it at system startup.
First, we want our Package Manager to search for the latest packages by using the following command in the terminal.
sudo apt update
If there are still updates that haven’t been processed yet, now is the time to do them.
sudo apt upgrade -y && sudo apt autoremove -y
This will process any updates that might be pending, as well as removing not needed packages. Now that Ubuntu is up-to-date, we can install Apache web server by using this command:
sudo apt install apache2
This will install the Apache web server as well as the service to run in at system startup.
Start, stop and restart will be done by the following systemd commands:
sudo systemctl start apache2
sudo systemctl stop apache2
sudo systemctl restart apache2
You can also enable and disable the reverse proxy’s service with the following commands:
sudo systemctl enable apache2
sudo systemctl disable apache2
If you want to know what the current status of the Apache web serer is, type the following command:
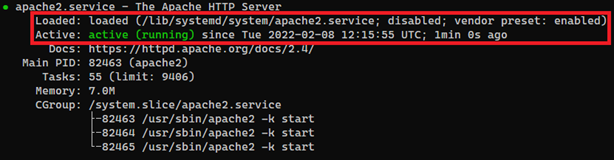
sudo systemctl status apache2
The output of the command above will look like this if the Apache web server is loaded and active.
And this is how the output looks if the Apache web server is stopped.

5.2 Configuration
Now that we have a running Apache on our Ubuntu Server it’s time to configure some things. To work as a Reverse Proxy serving requests to the Publishing Server we need to activate some additional modules of the Apache. In the Apache on Ubuntu this will be done by using some commands as well.
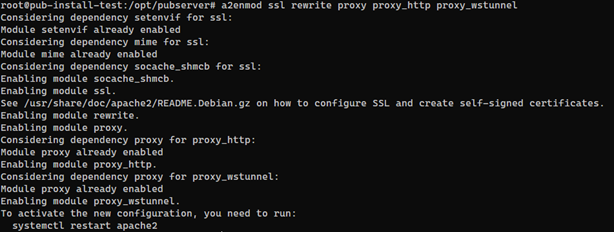
sudo a2enmod ssl rewrite proxy proxy_http proxy_wstunnel
The following Modules will be enabled:
ssl(to enable SSL support for the Webserver)rewrite(is needed to process the Rewrite Rules used to serve Websocket Requests)proxy(Main Proxy Module, needs alsoproxy_http)proxy_http(is needed by the proxy Module to process http/https Traffic)proxy_wstunnel(is needed to process Websockets through the Proxy)
The output of the a2enmod command will look like this. The SSL module has some dependencies that will be activated automatically.
Next, we want to put the certificates where they belong. For Ubuntu there are normally directories you can use for this:
/etc/ssl/certs/for the Certificates/etc/ssl/privatefor the Certificate Key
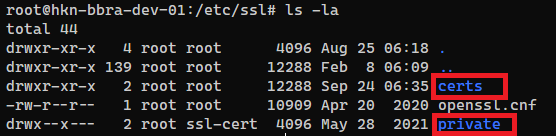
You need the path to those certificates as well as the key later in the configuration file of the web server.
We are providing a configuration where you only need to change a few options as long as the Reverse Proxy is on the same system as the Publishing Server (see 3 Example Configuration Files). If you want to use the config on a dedicated proxy server you need to also change the ProxyPass Rules as well as the Rewrite Rule for the web sockets to point to the server address of the Publishing Server. Additionally, you need to change the paths to the certificates:
- SSLCertificateChainFile
- SSLCertificateFile
- SSLCertificateKeyFile
Change ServerName and ServerAdmin as well.
The configuration belongs into the directory /etc/apache2/sites-available 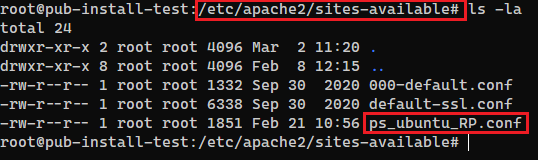
Now that we have the configuration file in the right place, we have to activate this configuration. For this, we use an Apache terminal command:
a2ensite Name_of_the_Configuration
In our case:

As you can see, we have to reload the Apache to make this change.
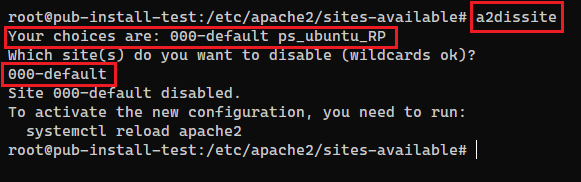
But before that we will remove the standard config from the Apache because it is not needed when using our configuration. For this we use the command a2dissite:
a2dissite 000-default
This works as well:
Now we will reload Apache with the command
systemctl reload apache2
In case Apache is not running we just need to start it with
systemctl start apache2
You are done: Apache should now be running and serving port 80 and 443 for the machine.
6 Troubleshooting
6.1 Login fails / Websockets
- Make sure that websockets are tunneled through the proxy
- Check if your apache configuration contains this configuration (see complete configuration attached to this article):
RewriteEngine on RewriteCond %{HTTP:Upgrade} websocket [NC] RewriteCond %{HTTP:Connection} upgrade [NC] RewriteRule ^/?(.*) "wss://<pubserver host>:<pubserver port>/$1" [P,L]
6.2 Apache Version > 2.4.47
- set Apache ProxyWebsocketFallbackToProxyHttp Directive to Off to be able to login to priint:suite / Neowise
ProxyWebsocketFallbackToProxyHttp Directive
| Description: | Instructs this module to let mod_proxy_http handle the request |
|---|---|
| Syntax: | ProxyWebsocketFallbackToProxyHttp On|Off |
| Default: | ProxyWebsocketFallbackToProxyHttp On |
| Context: | server config, virtual host |
| Status: | Extension |
| Module: | mod_proxy_wstunnel |
| Compatibility: | Available in httpd 2.4.48 and later |
Since httpd 2.4.47, mod_proxy_http can handle WebSocket upgrading and tunneling in accordance to RFC 7230, this directive controls whether mod_proxy_wstunnel should hand over to mod_proxy_http to this, which is the case by default.
Setting to Off lets mod_proxy_wstunnel handle WebSocket requests as in httpd 2.4.46 and earlier.
see also: mod_proxy_wstunnel