AuthService Configuration
1. Overview, Prerequisites and Payara Properties
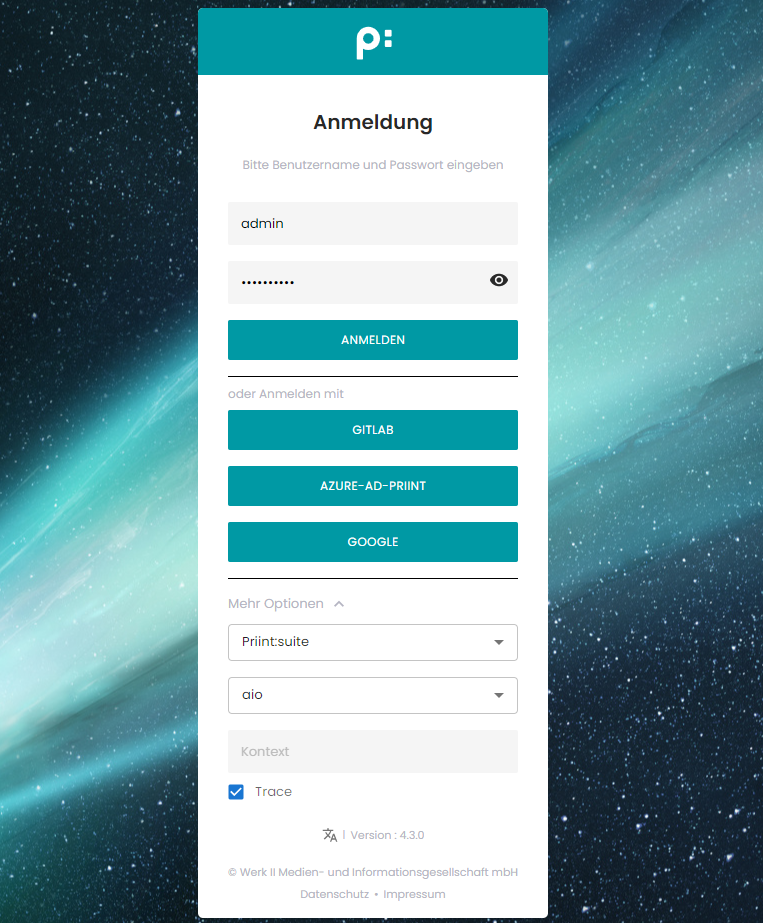
Starting from priint:suite version 4.2.3137and priint:comet 4.2 R32240 (InDesign only) it is possible to use an external identity provider with OpenID Connect and Single Sign On. This means, if a user is in a browser already authenticated by the external identity provider, the login to priint:suite does not require another password. The implementation is done in a way that the actual secrets, the password etc, are only given to the external identity provider. See for example Wikipedia OpenID Connect for an explanation of OpenID Connect. For using this a special configuration file is needed, see next section, and the following properties in Payara. Run Payara administration console, in the menu on the left, click on "server (Admin Server)" menu item and then on "Properties" tab. Two properties must be added:
pubserverLoginUriwith value:/auth/loginpubserverLogoutUriwith value:/auth/api/logout
2. Configuration File
Configuration file is placed in a sub-folder in the domain folder: [path_to_your_domain_folder]/config/AuthService and its name is config.xml. Example file:
<authService>
<apps>
<app name="priint:planner" id="priintsuite" visible="true">
<uri>/PriintSuite/PriintSuite.html?db={project}&locale={locale}</uri>
</app>
<app name="priint:neowise" id="neowise" visible="true">
<uri>/Neowise/</uri>
</app>
<app name="priint:comet" id="comet" visible="false">
<uri>http://localhost:{referrerPort}/accept?server={requestURI}&login={userName}&project={project}&language={locale}&sessionId={sessionId}</uri>
</app>
<app name="priint:admin" id="admin" visible="true">
<uri>/Admin</uri>
<sessionCookieName>adminSessionId</sessionCookieName>
</app>
</apps>
<callback>https://server_address:server_port/auth/callback</callback>
<realms>
<realm name="gitlab">
<type>org.pac4j.oidc.config.OidcConfiguration</type>
<discoveryURI>https://gitlab.com/.well-known/openid-configuration</discoveryURI>
<clientId>your_client_id_here</clientId>
<secret>your_secret_here</secret>
<membershipAttribute>groups_direct</membershipAttribute>
<membershipMapping>priint-dev:All Rights</membershipMapping>
<defaultDataset>DefaultProject</defaultDataset>
<membershipTeamsMapping>priint-dev:TestTeam</membershipTeamsMapping>
<defaultTeam>TestTeam</defaultTeam>
</realm>
<realm name="azure-ad-priint">
<type>org.pac4j.oidc.config.OidcConfiguration</type>
<discoveryURI>https://login.microsoftonline.com/b6228f6f-4d3d-49c4-8d68-3c1b1705f9b6/v2.0/.well-known/openid-configuration</discoveryURI>
<clientId>your_client_id_here</clientId>
<secret>your_secret_here</secret>
<useNonce>false</useNonce>
<usernameAttribute>preferred_username</usernameAttribute>
<emailAttribute>preferred_username</emailAttribute>
<displayNameAttribute>name</displayNameAttribute>
<membershipAttribute>wids</membershipAttribute>
<membershipMapping>88d8e3e3-8f55-4a1e-953a-9b9898b8876b:Admin,b79fbf4d-3ef9-4689-8143-76b194e85509:Designer</membershipMapping>
<defaultDataset>DefaultProject</defaultDataset>
</realm>
<realm name="Google">
<type>org.pac4j.oidc.config.OidcConfiguration</type>
<discoveryURI>https://accounts.google.com/.well-known/openid-configuration</discoveryURI>
<clientId>your_client_id_here</clientId>
<secret>your_secret_here</secret>
<useNonce>false</useNonce>
<defaultRole>All Rights</defaultRole>
<defaultDataset>DefaultProject</defaultDataset>
</realm>
</realms>
</authService>
2.1 Applications
In applications part we can configure the name attribute of the app tag and optionally we can add sessionCookieName node. Default sessionCookieName is Constants.PUBSERVER_SESSSION_NAME, it is defined in PubserverSDK. Note: Name of a cookie set in sessionCookieName node, has to be supported by the application you configure it for.
2.2 Realms
In realms section we can configure realms for log-in using external identity service - realms section is optional. Find details in the next section.
2.3 Callback
There is also callback tag - this is the URL to reach publishing server authentication from the OpenIDConnect provider. Do not forget to put your server address and port there!
3. Realm Configuration
Create a realm node for every external identity provider you need in the configuration file as shown in the previous section. The name attribute of the realm is used to label the login button in the login screen. Please do not use spaces inside the name.
The element realm can have the following elements, some required and some optional.
| Element | Req/Opt | Description |
| type | Required | As of now, must be set to org.pac4j.oidc.config.OidcConfiguration. Currently we don't support other types. |
| discoveryURI | Required | The value must contain the valid URL that exposes metadata for the Open ID connect for the external identity provider. |
| clientID | Required | Received from external identity provider. |
| secret | Required | Received from external identity provider. |
| displayNameAttribute | Optional | Where to read the displayName from that is shown as "name" in the list of users in priint:suite administration. |
| emailAttribute | Optional | From which claim to read the email address for the user account. |
| firstnameAttribute | Optional | From which claim to read the first name for the user account. |
| lastnameAttribute | Optional | From which claim to read the last name for the user account. |
| usernameAttribute | Optional | From which claim to read the username that is used as "login" in the list of users in priint:suite administration. |
| defaultDataset | Optional | If a new user is created on first login this is the default dataset (i.e.CometProject) that the user will be assigned to. The user can only login into publishing planner if a dataset is assigned. The dataset should be the identifier (not the name) of your comet project, as can be seen in ison. |
| membershipAttribute | Optional/Required | From which claim to read the memberships that map to roles in publishing server. The role mapping itself is specified via the membershipMapping property. The element is not needed if you configure a <defaultRole/> instead. |
| defaultRole | Optional | If a new user is created on first login this is the default role in Pubserver it is assigned to. Further roles can be assigned by publishing planner UI. This can be overruled by setting membershipMappings. |
| defaultTeam | Optional | Set a default workflow team for the user. This can be overruled by setting membershipTeamsMapping. |
| membershipMapping | Optional | Comma separated string with directoryGroup:pubserverRole pairs defining a mapping between membership groups as read from membershipAttribute and publishing server roles. Alternatively a simple group name prefix can be defined. This is only used if membershipFunction is also set.This overrules the defaultRole setting. |
| membershipTeamsMapping | Optional | Comma separated string with OAuthGroup:pubserverTeam pairs defining a mapping between OAuth server groups and publishing server workflow teams. Syntax: [OAuth-Group1]:[Team1]:[Team2],[OAuth-Group2]:[Team3] This overrules the defaultTeam setting. |
3.1 Azure Configuration
The external identity provider must be configured as well to work together with the Pubserver. The exact steps required depend on the provider you use. Here we show some of the steps registering a Pubserver with Microsoft Azure Active Directory as an example. Please refer to the documentation of Microsoft Azure Active Directory or the external identity provider you need for more details.
Log in to the Azure portal, go to Azure Active Directory, Enterprise applications and there to Application registrations:
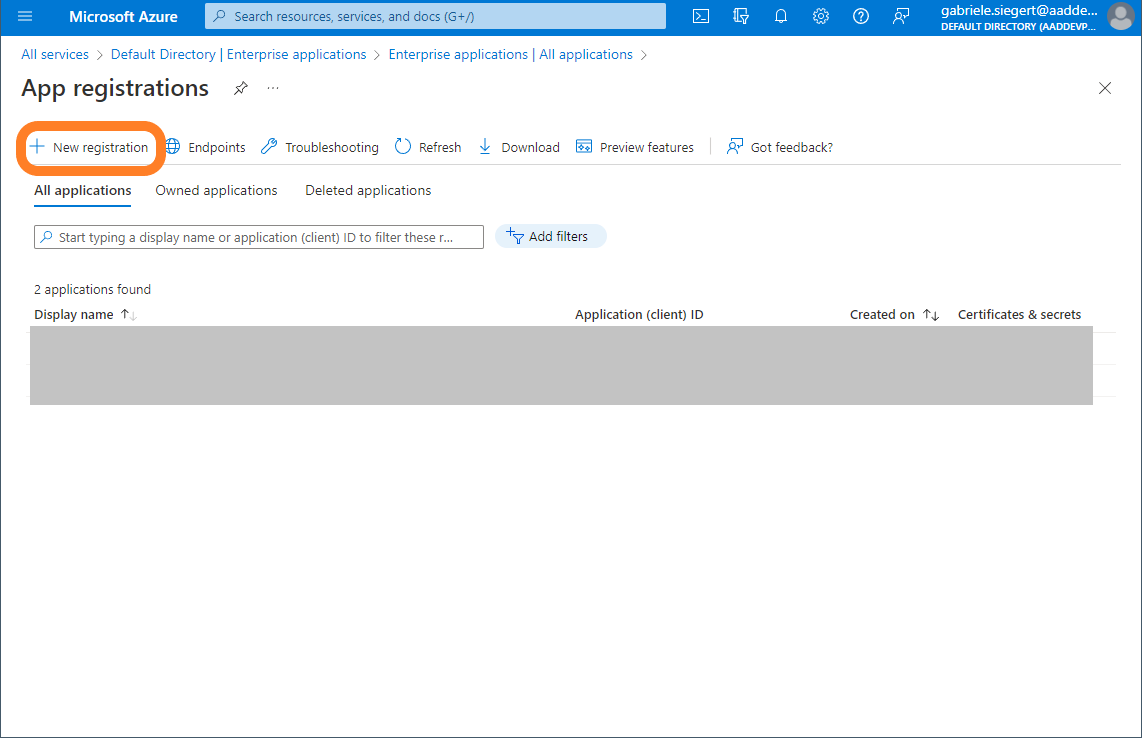
Use the button New registration.
In the following screen add a name for the registration. If you are planning to register more than one Pubserver, use an intelligent name.

You must add a client secret (1) and a redirect URI (2).
Add client secret:
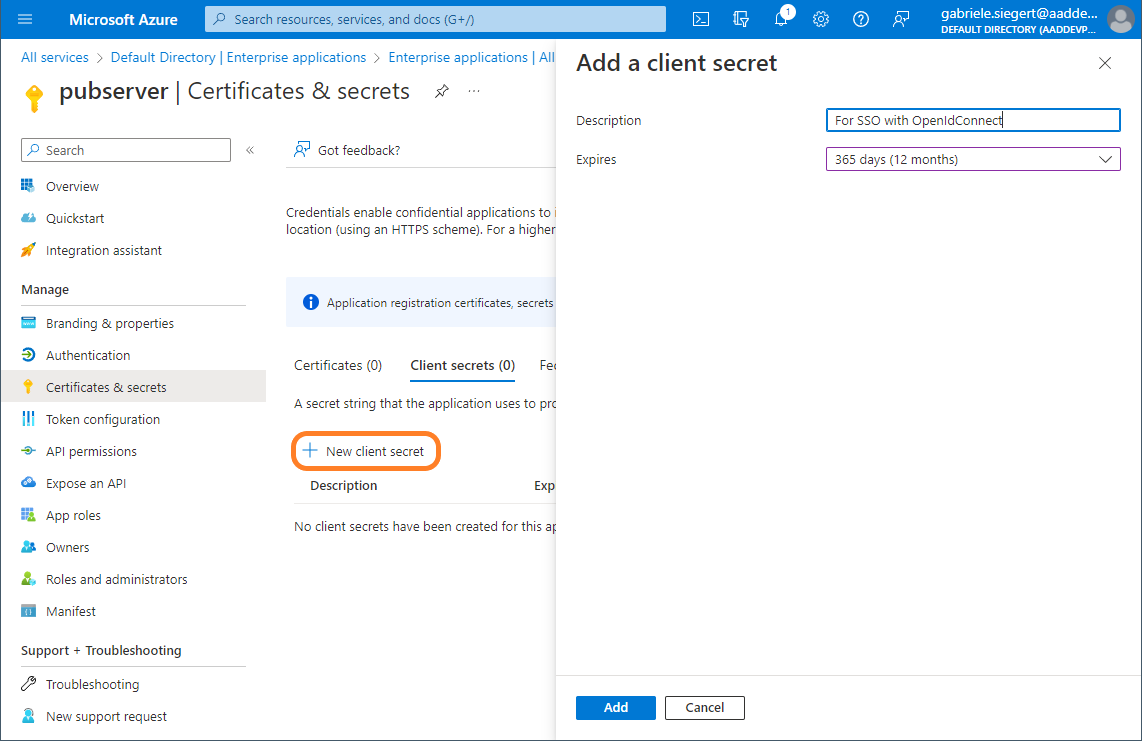
After filling the field and clicking Add, you see and copy the secret:
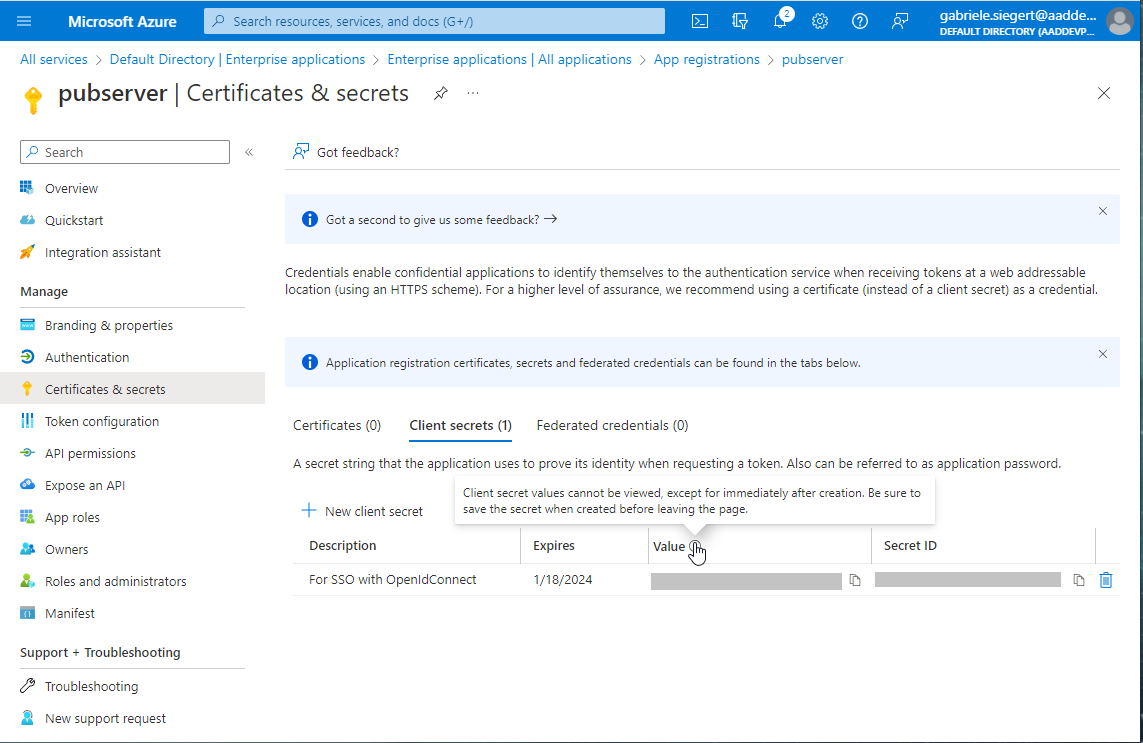
Make sure you save the secret before you leave this page, since there's no way to get it again!
Then a redirect URI must be added.
Add a Web Redirect URI of the following form:
https://your_server:your_port/auth/callback?client_name=realm_name
Open ID Connect will only work as expected if you added the correct URI here.
3.2 Gitlab Configuration
Log in to the Gitlab portal, go to your account Preferences, and there to Application registrations:
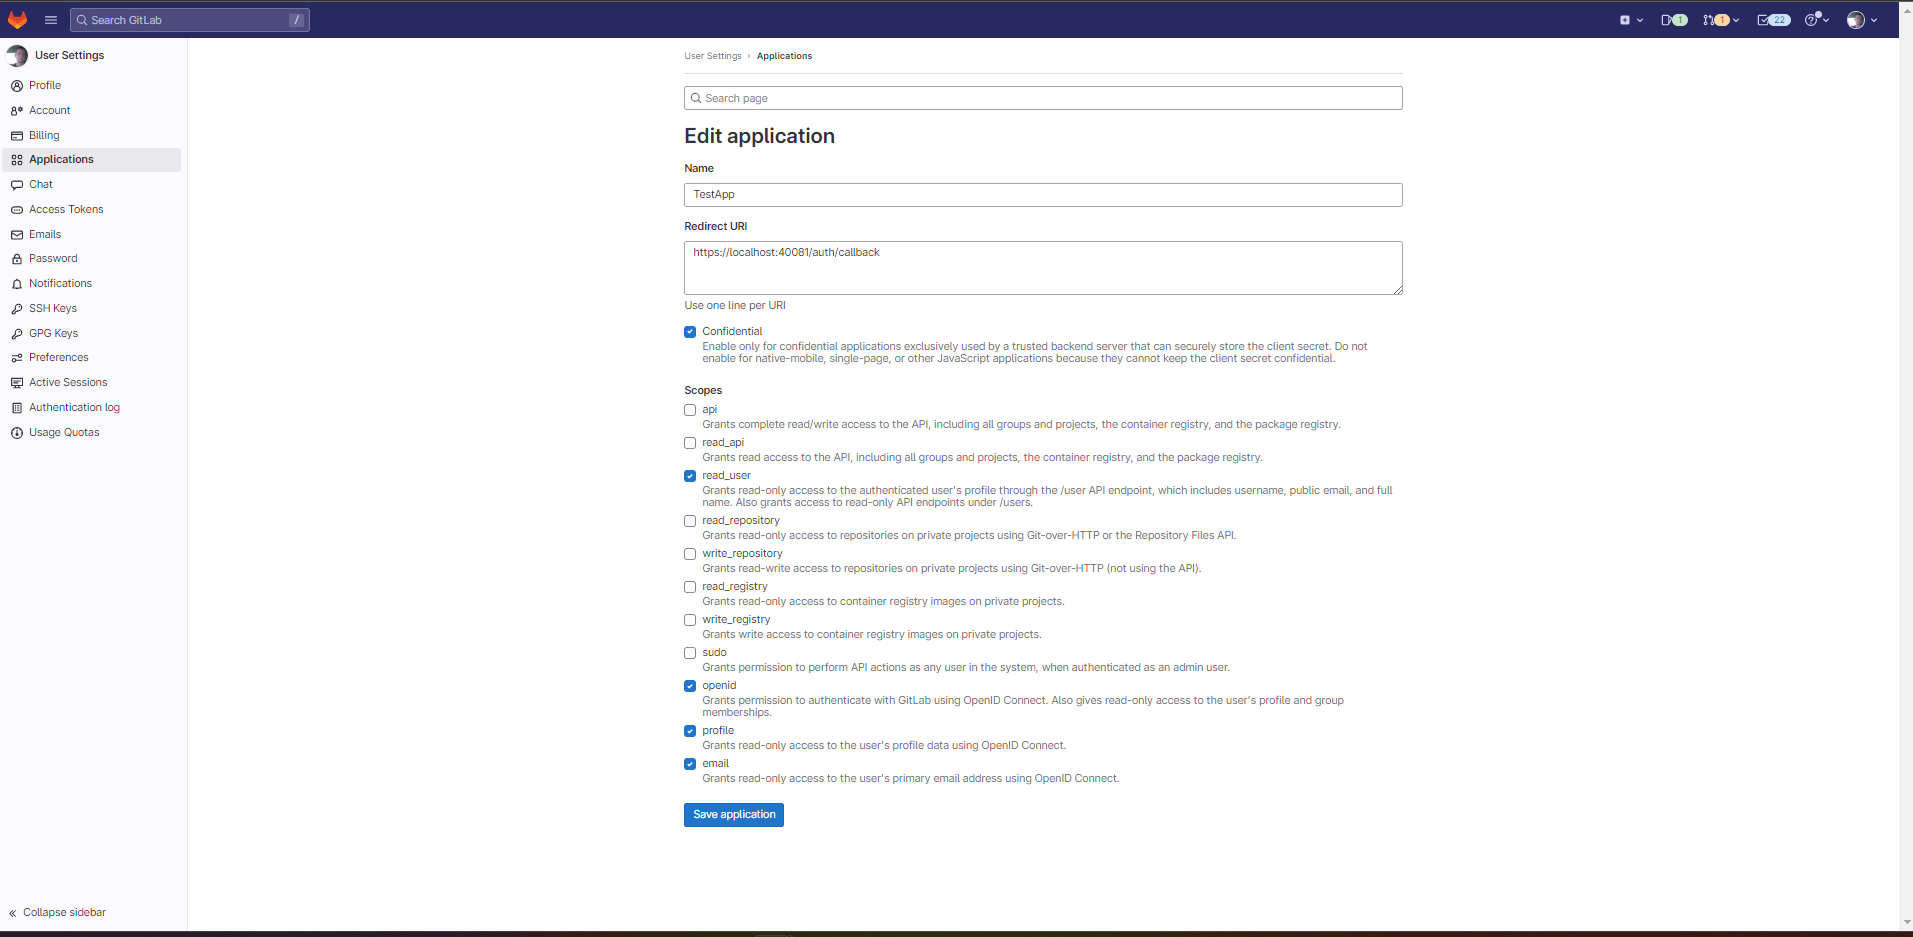
Click "Save application". You should see following screen:
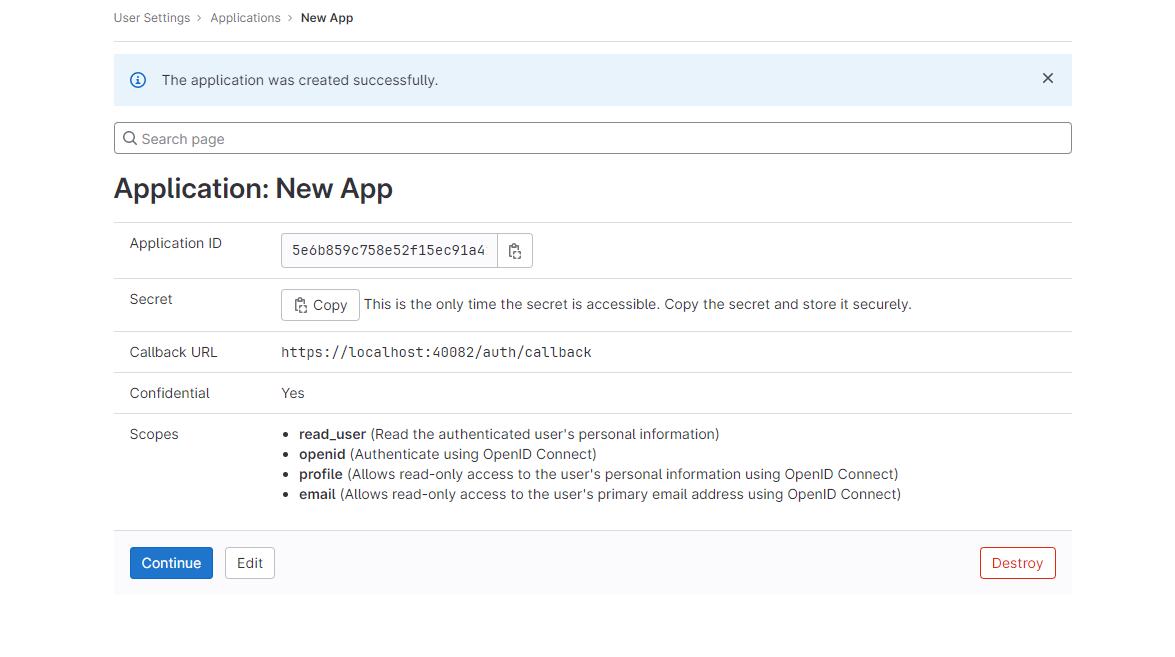 You should copy necessary information from the screen like application id and secret. And click "Continue" to finish configuration.
3.3 Default language configuration
When we run AuthService for the first time we can set default translations language. To do so you have to add
defaultLanguage node in Neowise/{tenant}/custom/ApplicationConfig.xml.
Example:
<cfg:defaultLanguage>fr</cfg:defaultLanguage>
Available values are: de, fr, en, ja, if none of these values is set the fallback language is English.