Quick Installation and Setup of Adobe InDesign Server® with priint:comet
Quick Installation Guide
Prerequisites
Check each point below. Start installation only if all requirements are been fulfilled and all necessary information has been collected.
Adobe ID:
A valid Adobe ID is required to activate the software.
Adobe InDesign Server license:
The Adobe InDesign Server license. A trial license can be generated later on (see How-to-get-an-InDesign-Server-trial-license).
Hardware (Windows):
Intel® Pentium® 4 or AMD Athlon® 64 processor (dual core and faster) Microsoft® Windows Server® 2008 R2 (64 bit) or Windows Server 2012 4 GB of RAM (8 GB recommended); 2–8 GB per additional instance 1.6 GB of available hard-disk space for installation; additional free space required during installation (Windows virtual memory paging file size must be increased 2 GB for each instance of InDesign Server) 1024 x 768 display (1280 x 800 recommended) with 16-bit video card Adobe® Flash® Player 10 software required to export SWF files.
Activation
This software will not operate without activation. Internet connection and registration are required for software activation, membership validation, and access to online services. For more details, please check Adobe web site: https://helpx.adobe.com/indesign/kb/system-requirements-indesign-server.html
User Account:
InDesign Server should be installed as a Windows service. It is recommended to create an own user account (e.g. named "InDesignServer") with sufficient permissions. Since InDesign Server CC 2017 it is not done automatically.
Firewall rules:
As InDesign Server instances are connected via the SOAP API, ports of all instances has to be reachable from the network if the publishing server is not on the same machine.
Network Shares:
In many cases template documents and image files will be located on network shares. Be sure that the shares are accessible from the machine with read and write permissions for the service user.
Document Conventions
| Path | Description |
|---|---|
| $installer_path | Path of the folder containing the installers In this tutorial, $installer_path will be “F:\Adobe\Adobe InDesign CC Server 2015” and must contains the comet plugin for InDesign CC 2015 Server. |
| $comet_installer | Zip file of the comet plugin for InDesign CC 2015 Server |
| $indesignserver_path | Path of the folder where the InDesign CC Server will be installed In this tutorial, $indesignserver_path will be “D:\applications\Adobe\Adobe InDesign CC Server 2015” |
| $indesignserver_instances_path | Path to a folder which will contain log/cache etc. of an instance. |
Adobe InDesign Server Installation
For InDesign Server Installation you have to run the installation wizard by Adobe.
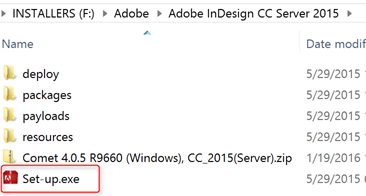
Select Installation Package
Go to the $installer_path. Double-Click on « Set-up.exe » to start the installation, it will open a window:
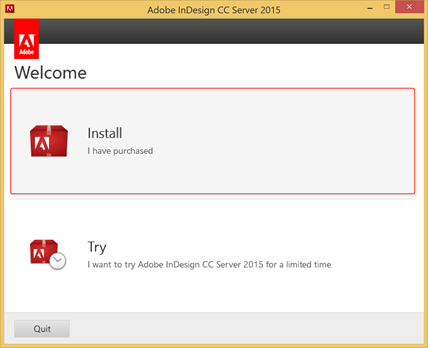
Select License Option
Click on « Install » if you purchased it, else, click on « Try »
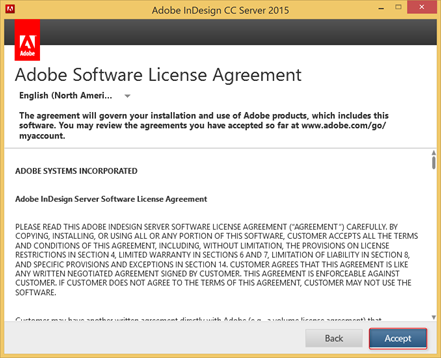
Accept License Agreement
Accept the license agreement and click on « Accept»
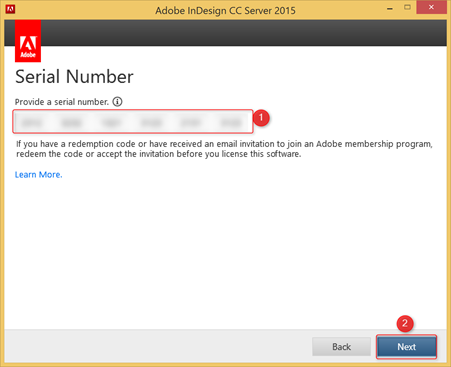
Enter your license
Enter your license and click on « Next »
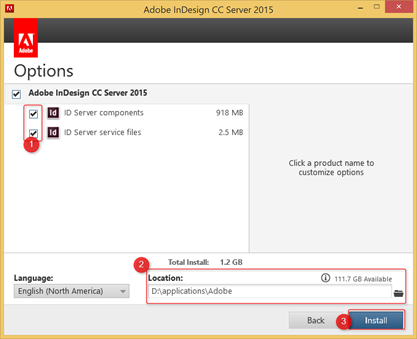
Check Installation Options
Check all the components, change the location path (optional), and click on « Install »
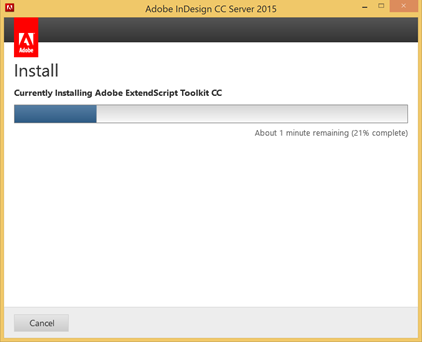
Running Installation
System will show installation progress.
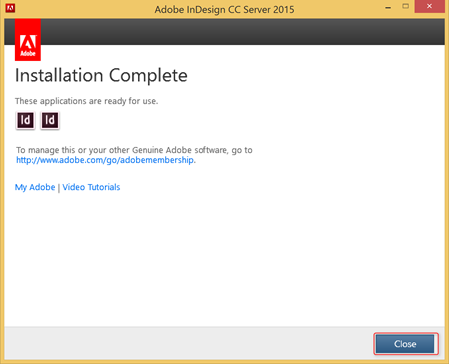
Once the installation is done, click on « Close »
InDesign Service Creation and Configuration
Windows Service - Creation
To install the service using the command line you need to have administrator rights. Go to the directory where Indesign Server is installed.
Run the following command
InDesignServerService.exe /install
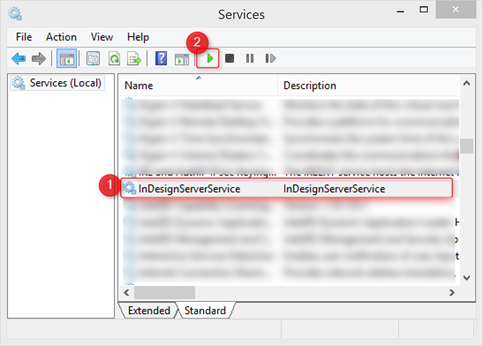
After this process runs successfully you should be able to see the IndesignServerService inside of the Windows Services Console.
Windows Service - User Properties
Go to the Windows services management console and double-click on the service « InDesignServerService » to open the details window.
Select the « Log On » tab and change the user/password to have an administrator user instead of the Local Service, and click on « Apply ».
N.B.: The user defined here must be able to read/write on the network shared folders. It is strongly recommended to create a own user in your windows domain for this purpose.
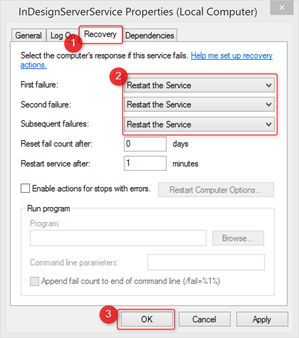
Windows Service - Recovery Properties
Select the « Recovery » tab and change all the failure actions to « Restart the service » and click on « OK »
Register InDesign Server Management Console
The second component of the InDesign Server Windows Service is the InDesign Server Service Management Console snap-in. If you installed the service using the InDesign Server installer, the snap-in also was installed then. If you used the command line to install the service, you also need to install the snap-in, as described here.
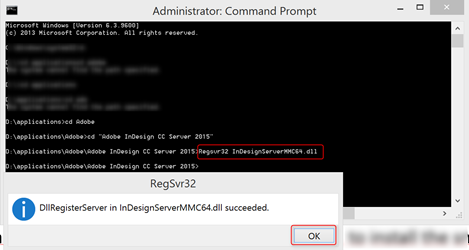
Start a Windows command line as administrator and go to the folder $indesignserver_path by doing “cd $indesignserver_path”
Run the following command: “Regsvr32 InDesignServerMMC64.dll” and click on “OK”
priint::comet Plug-in Installation
The installation of comet plug-ins or InDesign Server is not supported by a wizard. You simple have to unpack files into a target folder (and remove some unnecessary flies).
Unpack into InDesign plug-ins folder
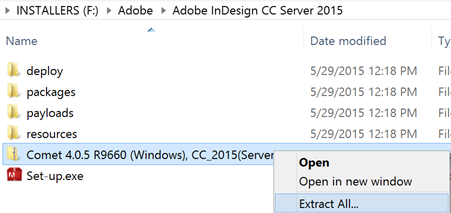
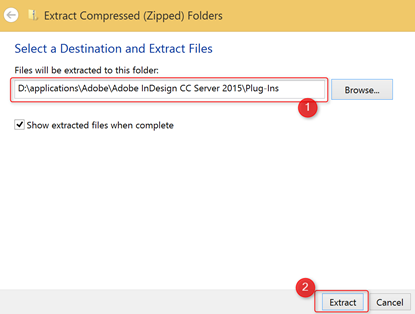
Go to the $installer_path and uncompress the $comet_installer to the $indesignserver_path/Plug-Ins folder
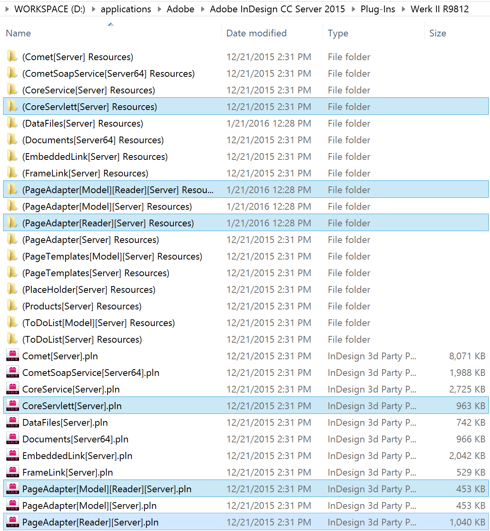
Go into the folder «� $indesignserver_path/Plug-Ins/WERK II RXXX »
Remove surplus files
The installation package may contain files and folders that are not needed for your system. You must remove these files/folder. For details on the selection of files see the detailed installation guide.
Delete the following folders/files:
priint::comet Plug-in Licensing
comet plug-ins will need a license file. The license file is provided by priint.com on your request.
Get License Order Text
Start a Windows command line as administrator and go to the folder $indesignserver_path by doing “cd $indesignserver_path”.
Run the following command: « InDesignServer.com » and copy the content from « // » to the « Expired » line. It contains the appropriate license order text.
Create a new text file and paste the content previously copied into it.
Request a License from priint.com
Send the text file to license@priint.com with the request to create a license for the server.
License processing contains manual steps so it depends on office hours. You will receive the license file by e-mail.
After you received the license file (w2.lic) copy it into the $indesignserver_instances_path.
Configure InDesign Server Instances
InDesign Server can run in multi-instance mode.
For configuration of instances follow the steps below.
Prepare the Configuration Snap-in
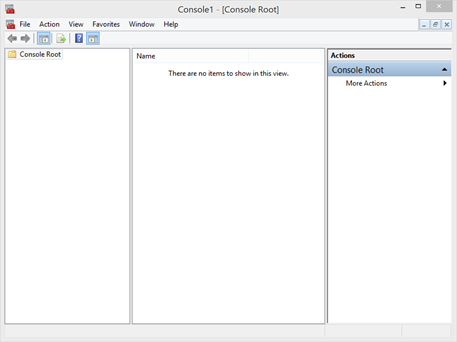
Start a Windows command line as administrator and run run « mmc » to start Microsoft Management Console.
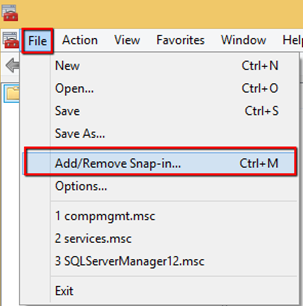
Go to « File > Add/Remove Snap-in »
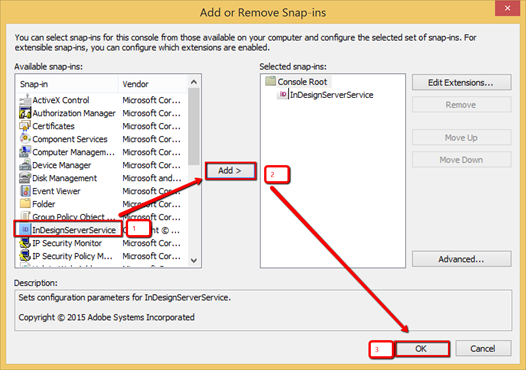
Select InDesignServerService, click on « Add > » and click on « OK »
Add an InDesign Server Instance
In the snap-in right-Click on « InDesignServerService > New > New InDesignServer instance »

Open a text editor, copy the following line and adapt it to your folder paths:
-configuration Instance01
-cometport 4711
-Comet D:\applicationsdata\indesignserver\log\Comet01.log
-cometapilog D:\applicationsdata\indesignserver\log\api01.log
-cometcache D:\applicationsdata\indesignserver\cache\instance01
-cometlic D:\applicationsdata\indesignserver\w2.lic
-previews
–LogToApplicationEventLog
Edit the bold values above to have the correct paths to the $indesignserver_instances_path.
- Port must start at 4711 and be incremental.
- All folders must exist.
Do as much instances you need. Copy each line as a new InDesignServer instance in the mmc Close the mmc. The result may look as follows:

Check the Installation
Go to the Windows services management console and double-click on the service « InDesignServerService » to open the details window.
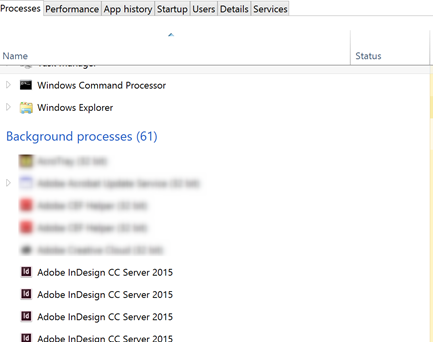
Start the Service

Open the Windows Task Manager and go into processes: there should be as much « Adobe InDesign CC Server 2015 » processes as instances you defined!
Open a web browser and enter the following url: http://127.0.0.1:\[PORT\] And test each instance, for each, you should see a soap response like this:
