How-To Creating a comet Project
1 Overview
With publishing server comet projects are created and implemented mainly in ison. A comet project needs an entity model. The entity model should be fully configured so that the data can be seen in ison in "Bucket tree test" before any comet implementation starts. As soon as the comet project is created it can be used in InDesign. The comet panel "Product pool" displays the same data as the "Bucket tree test" immediately.
2 Create a comet project in ison
In ison comet projects are created in "comet Explorer" (perspective ison). You find the wizard for a new project in the context menu of the according tentant/client folder, default "WerkII".

Choose "New project" and you will get the following dialogue.
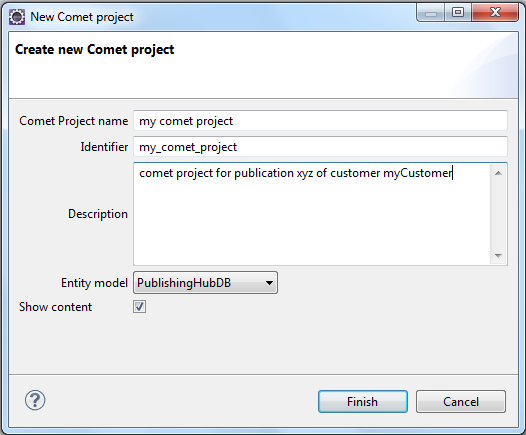
Select a good project name. The identifier must fulfill the standard identifier rules. The field description should be used for documentation. Choose the entity model for your project in the drop-down. The setting of Show content controls whether the panel "Product pool" will show content entities or not. Click Finish to create the new comet project.

The new project is created containing automatically configuration for InDesign events. The project can be used now with comet InDesign plug-ins. Connect via SOAP to it:
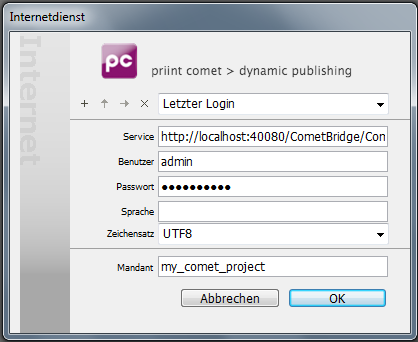
Service: http://<pub-server IP>:<pub-server port>/CometBridge/Comet3Service User (Benutzer in screenshot): <your pub-server user> Password (Passwort in screen shot): <your pub-server password> Language (Sprache in screen shot): <fall back context settings>
Encoding: UTF8 Client (Mandant in screenshot): <your comet project identifier>
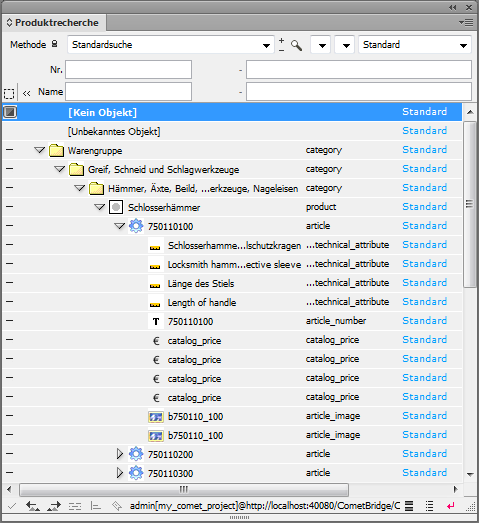
In the panel "Product pool" you can now display the data according to the entity model.
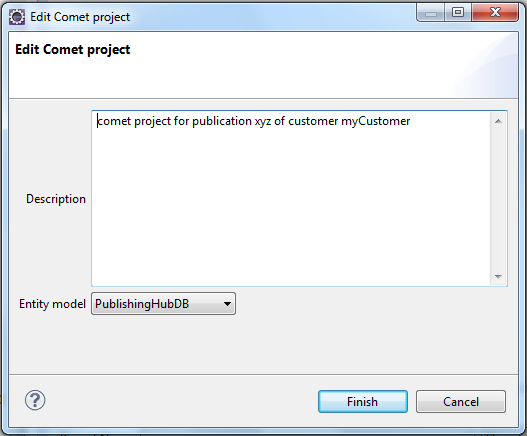
3 Change settings of an existing comet project
The settings of an existing comet project can be edited in ison in comet Explorer. Use Edit project properties in context menu of the comet project.

In the dialog you can change the description and select another entity model.